Category: Calibration

Horizontal boom sprayer calibration

  • How Much Pesticide in the Tank?

    How Much Pesticide in the Tank?

    Sprayer math can be intimidating, but the effort gives solid value. When combined with a calibrated sprayer you reap the following benefits:

    • Determine how much spray mix is required to apply the intended rate.
    • Estimate how much crop protection product must be ordered for the season.
    • Populate spray records which allow you to review practices, respond to enquiries and satisfy traceability requirements.

    There are many ways to perform sprayer math, and you need only look to local pesticide safety courses, industrial catalogues, and extension resource centres for examples. If you’re already comfortable with your current method, don’t mix and match with others. Sprayer math is a series of related calculations that employ constants to keep the units straight. It’s all or none.

    Walkthrough

    Let’s start with the classic, US Imperial formula for calculating the sprayer output. We’ll weave in Metric, later. This base formula can be adjusted to allow you to solve for any factor, as long as you’re only missing one piece of information. Turns out your high school teacher was right – you DO need algebra.

    GPM = [GPA x MPH x W] ÷ 5,940

    In this case, you can determine an output rate (GPM – gallons per minute). You’ll need to know your target volume (GPA – gallons per acre), your average travel speed (MPH – miles per hour) and your nozzle spacing (W – which is width in inches). The number “5,940” is a constant that handles all the unit conversions. If you divide the GPM by the number of nozzles on your sprayer (assuming they are all the same rate), you can hone in on the ideal nozzle size.

    But, as we noted earlier, you can do a lot more with sprayer math than just pick the ideal nozzle size. The rest of this article includes examples of both Metric and US Imperial formulae, but watch out for unit conversions. If at any time you don’t see the units you’re looking for, you can consult our unit conversion tool.

    Grab your calculator – it’s math time!

    Don’t be intimidated. With a little practice, sprayer math gets easier and it’s always worthwhile. The real trick is navigating unit conversions.

    Step 1 – How large is the area you need to spray?

    Multiply the length of the area you plan to spray times the width. If you are using metres, then divide the product by 10,000, which is the number of m2 in a hectare (ha). For feet and acres, divide by 43,560 which is the number of ft2 in an acre (ac):

    Step 2 – How much product is needed to spray the area?

    Consult the rate(s) shown on the label. In Canada, rates are often based on planted area (E.g. hectares). In Australia and New Zealand, they may be based on row length (not covered in this article). If you measure your area in acres, you’ll have to convert the rate by multiplying by a constant: 0.4.

    product-per-area

    Now multiply the area you want to spray (step 1) by the rate (step 2).

    product-per-area2

    Step 3 – How far can you go on a full tank?

    You know your sprayer output (determined through calibration) so you divide that into your tank size. Watch your units:

    full-tank-distance

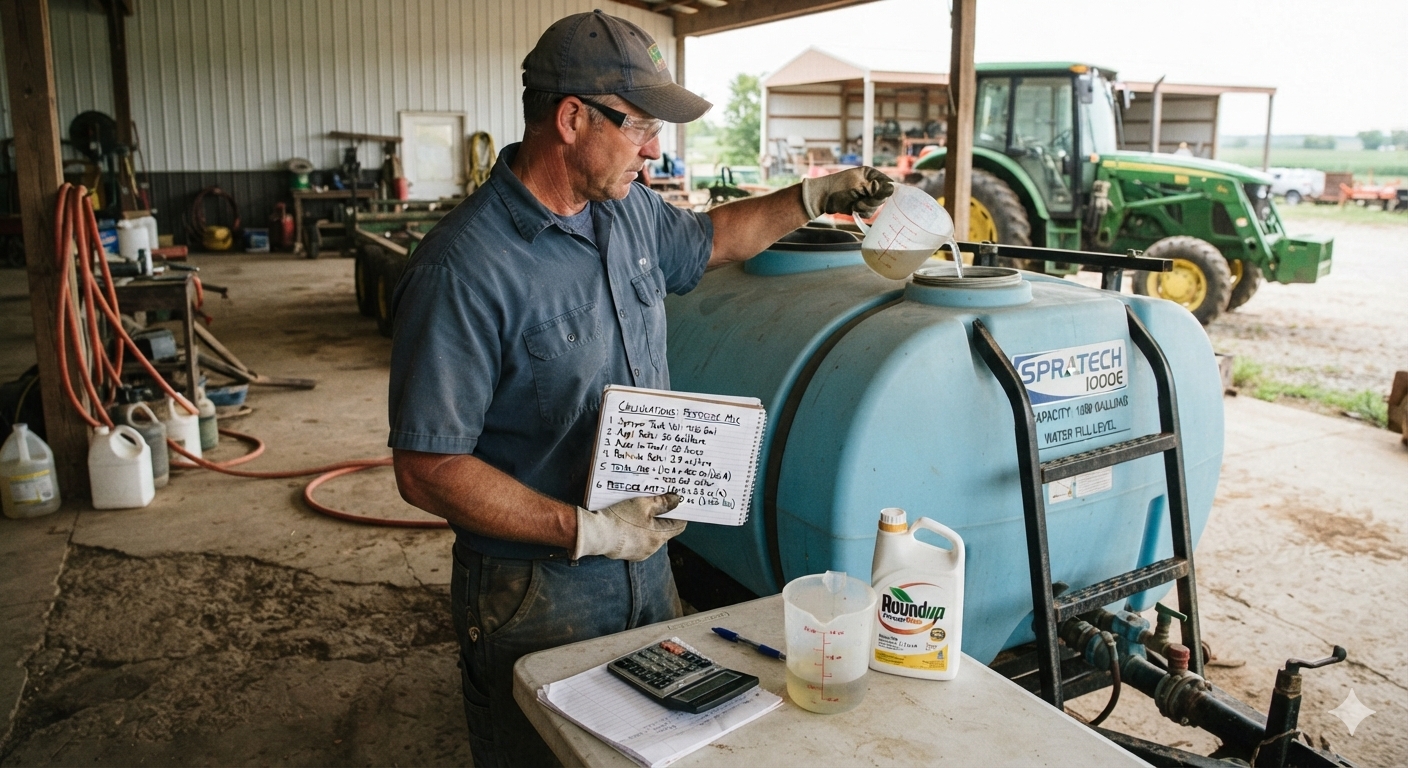
    Step 4 – How much pesticide per tank? 

    Multiply the area that can be sprayed per tank (Step 3) by the pesticide rate (Step 2). Again, watch your units:

    pesticide-per-tank

    Step 5 – How much area is left to spray?

    Just subtract what you’ve already sprayed from the total area.

    area-left-to-spray

    Step 6 – How much pesticide in the last, partially-full tank?

    Multiply the area you have left to spray (Step 5) by the pesticide rate (Step 2). Yes, watch your units:

    pesticide-partially-full-tank

    Step 7 – How much spray mix will I need for the partial tank to finish spraying the total area?

    Multiply the area you have left to spray (Step 5) by the sprayer output (determined through calibration). Guess what? Watch your units:

    spray-mix-for-total-area

    Sample problems

    Time to test your knowledge. Let’s suppose you want to apply a product rate of 3 L/ha to your blueberries. You calibrate your sprayer and determine your output to be 50 L/ha. Your tank holds 400 L of spray mix. Your planting is 500 m long and 200 m wide.

    Q1 – How large is the area you need to spray?

    area-to-spray

    Q2 – How much product is needed to spray the area?

    product-to-spray-the-area

    Q3- How much area can be sprayed on one tank?

    area-on-full-tank

    Q4 – How much product should be added to a full tank?

    product-needed-full-tank

    Q5 – After the tank is empty, how much area is left to spray?

    area-left

    Q6 – How much product to add to the last, partially full tank?

    product-partially-full-tank

    Q7 – How much spray mix will be needed to finish spraying?

    spray-mix-to-finish-spraying

    Tank mix calculator

    You might feel we buried the lead by adding this calculator to the end of the article. It’s important for a sprayer operator to understand the math required to interpret labels and calculate tank mixes, so hopefully you read and understood the process before you got here. And now that you have, this is a very helpful tool. Try it online, or download a standalone version.

    Notable exceptions

    Certain situations aren’t covered in this article. If you are spraying a greenhouse, the math is different. If you are performing a banded application, the math is different. And, if you’re an airblast operator trying to reconcile why a pesticide label uses planted area rather than canopy volume for its rates, you’re in for some additional reading.
  • Sprayer Math for Banded Applications

    Sprayer Math for Banded Applications

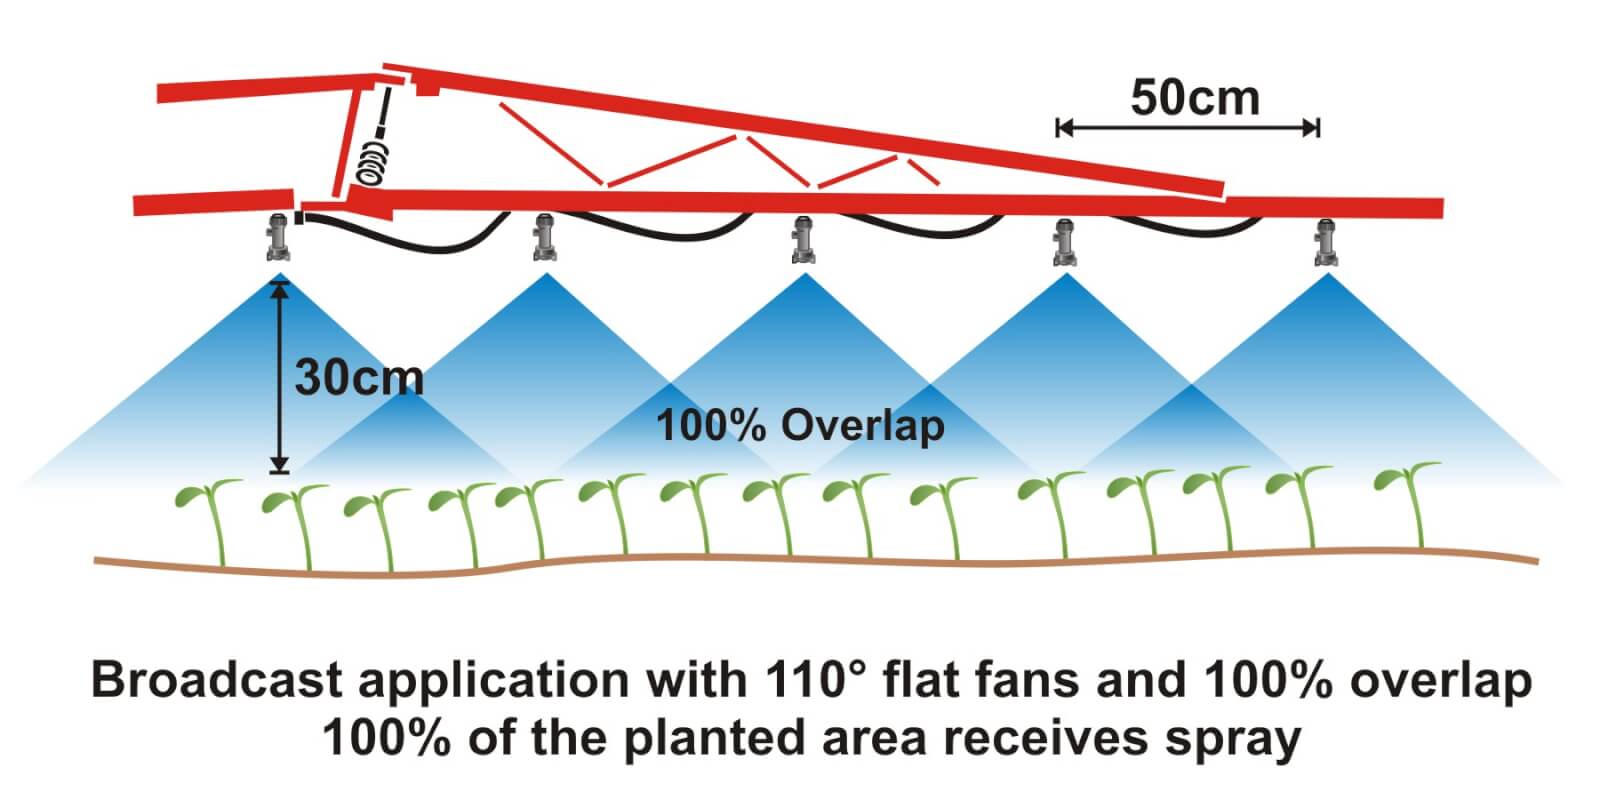
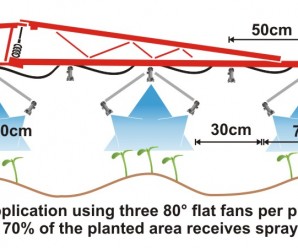
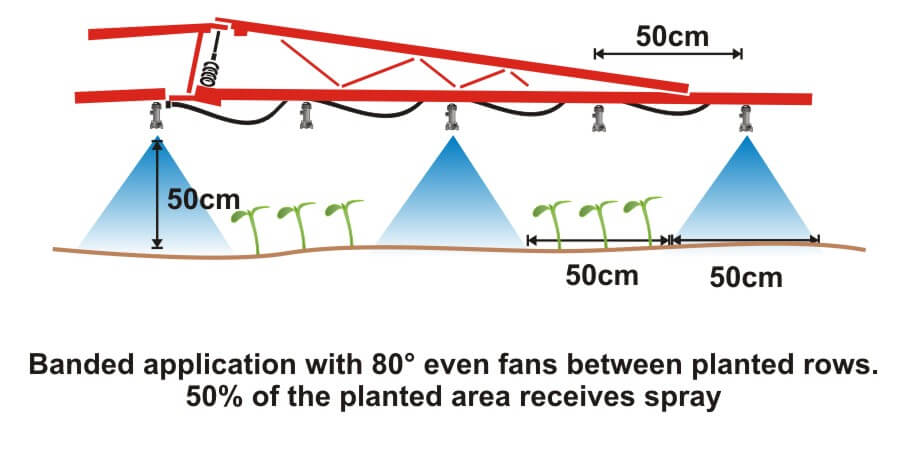
    Where crops are planted in rows, growers can save on chemical costs and reduce potentially wasted spray by performing banded applications. A banded application is treating parallel bands (Figure one), unlike a broadcast application where the entire area is treated (Figure two). This means only a portion of the field or orchard/vineyard floor receives spray, so the total amount of product applied per hectare (or per acre) should be less for banded than for broadcast.

    Figure 1
    Figure 1
    Figure 2
    Figure 2

    Banded applications are used in many situations, including:

    • Applying herbicides right over a crop during planting, both for pre-emergent or post-emergent crops.
    • Applying insecticides/fungicides by “directed spraying” using drop hoses or row kits; the latter is pictured in Figure three.
    • Carefully spraying herbicide between the rows to control weeds in the alleys of an established crop (Figure one).
    • Applying herbicide under fruit trees or grape vines to control weeds (Figure four).
    Figure 3
    Figure 3
    Figure 4
    Figure 4

    It’s easy to make mistakes when calculating product rates for banded applications and these can be costly errors: too little means poor control and too much means wasted product and possible crop injury. This article describes how to calculate sprayer output and product rate for common banded applications.

    Step One: Determine broadcast volume

    Pesticide labels typically list broadcast product rates (e.g. amount of formulated product per hectare or acre). In this example, let’s say the label recommends a broadcast product rate of 500 ml of formulated herbicide applied using 100 litres of spray mix per hectare (i.e. added to 99.5 L water).

    Step Two: Establish sprayer settings

    Select a travel speed that is safe, gives decent efficiency and doesn’t compromise coverage. For this example, we’ll say the sprayer moving is at 8.0 km/h.

    Select a band width that completely covers the target row and some of the adjacent area where control is desired. Band width should be measured along the ground for soil-applied products or along the top of plants for post-emergence products. We’ll use Figure one for our settings: bands are 50 cm wide on 100 cm centres. We’ll say that a single nozzle swath can treat the band, and that we’re spraying 2 hectares of planted area.

    Step Three: Calculate the banded sprayer output

    We can calculate how much of the planted area actually receives spray using this formula:

    [band width (cm) ÷ row width (cm)] x total planted area (ha) = actual sprayed area (ha)
    [50 cm ÷ 100 cm] x 2 ha = 1 ha

    For completeness, here’s the US formula:
    [band width (in) ÷ row width (in)] x total planted area (ac) = actual sprayed area (ac)

    From this we now know that we should be able to go twice as far on a tank spraying a banded application as we would a broadcast, because we’re only spraying half the planted area.

    Step four: Calculate the nozzle output

    Use the following formula to convert the broadcast output into the banded output:

    [broadcast output (L/ha) x travel speed (km/h) x (swath width (cm) ÷ number of nozzles per swath)] ÷ 60,000 = nozzle output (L/min)
    [100 L/ha x 8 km/h x (50 ÷ 1)] ÷ 60,000 = 0.67 L/min

    For completeness, here’s the US formula:
    [broadcast output (gal/ac) x travel speed (mph) x (swath width (in) ÷ number of nozzles per swath)] ÷ 5,940 = nozzle output (gal/min)

    If multiple nozzles were contributing to the swath, such as in figure three or figure four, this formula will account for it. You still mix the labelled product rate at a ratio of 500 ml of herbicide to 99.5 L water, but as we determined in step three, we should be able to spray twice the planted area using a banded application as we would a broadcast application.

    Warning! Watch your units. You may be familiar with other formulae for calculating your output. Do not mix and match formulae or parts of formulae. For example, here is another Metric option for determining L/min. It employs different units so it requires a different constant:

    [broadcast output (L/ha) x travel speed (m/min) x (swath width (m)) ÷ number of nozzles per swath)] ÷ 10,000 (m2/ha) = nozzle output (L/min)

    Step Five: Use the nozzle catalogue to find the right nozzle

    Using a nozzle manufacturer’s catalogue, select a nozzle that gives the desired spray quality (usually coarser for herbicides) and will produce the 50 cm swath we’re looking for (which can be adjusted a little using boom height). Always choose to operate a nozzle in the middle of its pressure range.

    Step Six: Calibrate the sprayer (i.e. double-check)

    Follow your typical calibration process and make minor adjustments until the nozzle discharge per minute results in the desired banded output. A rate controller will handle this on larger sprayers, but if you don’t have one you can make small adjustments to speed and pressure until the desired output is achieved. Ideally, if your math was right, these changes won’t be needed.

    When performed correctly, banded applications are a great way to focus your efforts on the target, saving time and money.

    Other Resources

    Download this booklet on spraying potatoes using banded rows. Or try our calculator:

  • How to Properly Set Up a Crop Sprayer

    How to Properly Set Up a Crop Sprayer

    Article reprinted with kind permission from an original article written by Oliver Hill in the February, 2017 edition of Farmers Weekly. Photos ©Kathy Horniblow.

    Crop spraying is one of the most important and highly skilled jobs undertaken on any arable farm, but it is facing increased public scrutiny. This is why it is vital that the kit you use as a means to apply pesticide to crops is in prime working order and is set up correctly to deliver the product safely and accurately to its target. Optimum sprayer set up will help to maximize the efficacy of applied products, reduce spray drift and keep machinery in good condition.

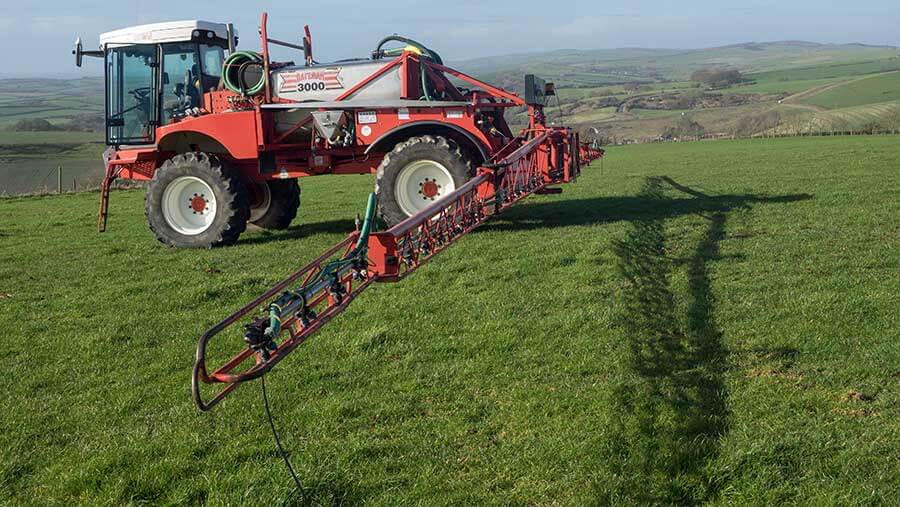
    For this best practice guide to sprayer set up, Farmers Weekly teamed up with former Farm Sprayer Operator of the Year Iain Robertson. Mr. Robertson is assistant arable farm manager at David Foot Ltd, a 2,200ha mixed farm south of Dorchester in Dorset, growing wheat, barley, beans, oilseed rape and maize as forage for the farm’s three dairy herds. The machine used for this guide is a Bateman RB26 self-propelled sprayer and while most of these checks and tests are universally applicable to all sprayers, it is also important to refer to the handbook of the manufacturer of your specific machine.

    Watch the video tutorial with Mr. Robertson and then see the step-by-step guide below for more detail.

    Pre Start Checks

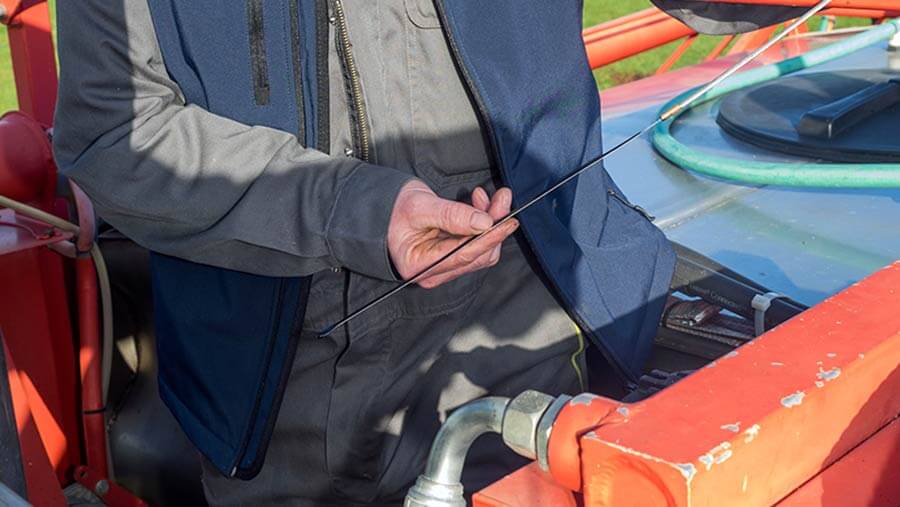
    Before firing up the engine, the first thing to do is your pre-start checks – that means checking your machine’s vital fluids like fuel, hydraulic oil, hydrostatic oil, engine oil and coolant levels. If yours is a self-propelled sprayer, chances are you’ll need to get up on to the back of the machine to check some of these.

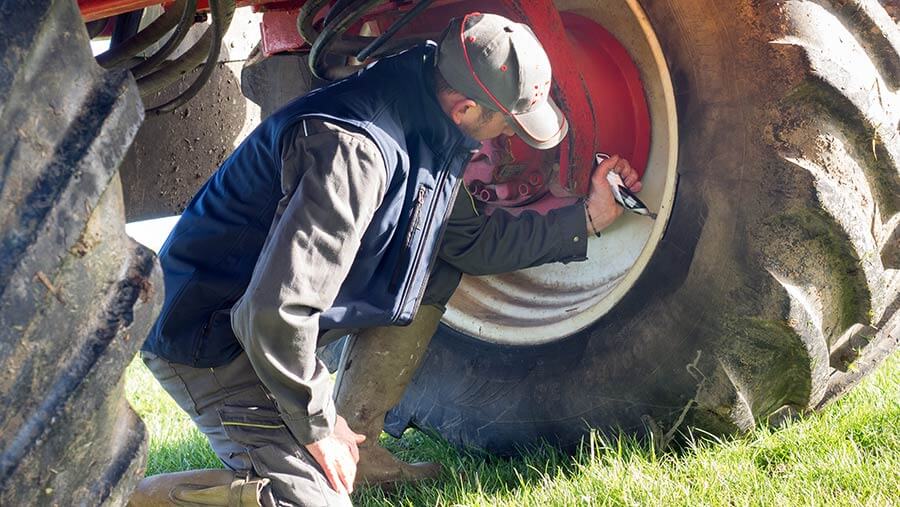
    “While I’m up on the back of the sprayer I also have a quick look in the top of the tank to make sure that it is nice and clean and the tank rinse nozzles have worked properly – cleanliness is next to godliness,” says Mr. Robertson. Next, move on to the tires. Use a pressure gauge to check all tires are at the correct pressure and refer to the manufacturer’s guidelines. If you’ve got a trailed sprayer, don’t forget to check the tractor tire pressures as well.

    Aim for tires to be run at the lowest pressure recommended for the load to be carried. This will help with boom height and stability and also helps tires act like a shock absorber to ride out bumps. If using a trailed sprayer, use a spirit level to ensure that the drawbar is level. Mr. Robertson says he tries to work around the machine in a methodical, clockwise manner to ensure that he doesn’t miss anything.

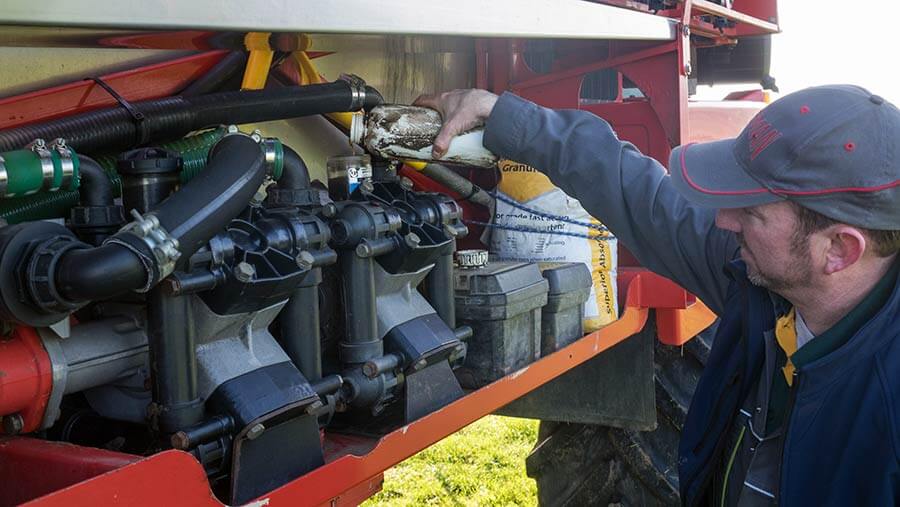
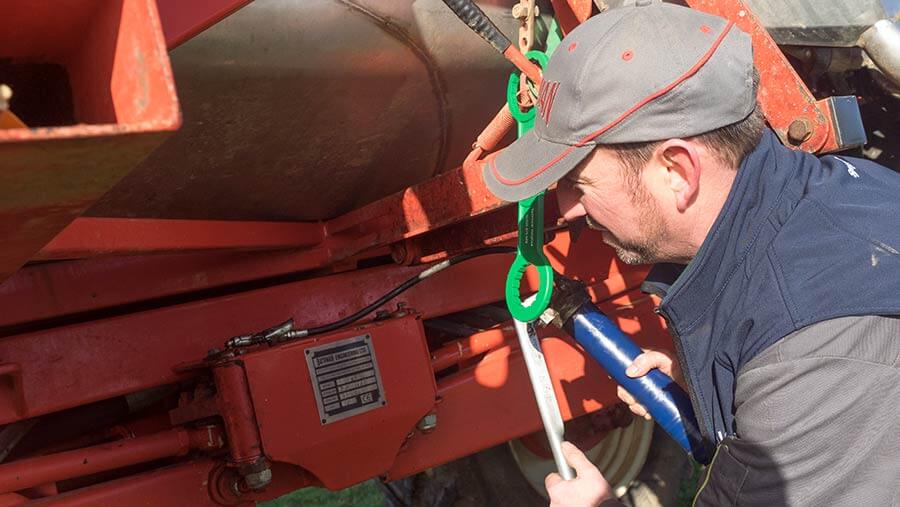
    Coming to the pumps, check that they have got enough oil, check that any tool boxes have enough spare parts and any equipment needed and make sure you are carrying a spill kit with absorbent granules and a spade in case the worst happens and there is a spillage. Make sure all parts are lubricated daily and that any grease nipples are cleaned before and after use to avoid them collecting dirt and blocking.

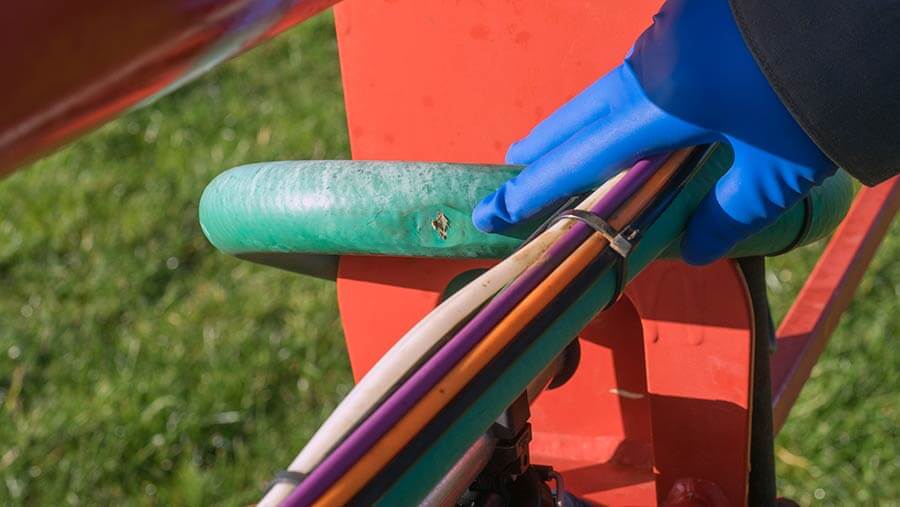
    Check all hydraulic hoses, spray lines and air lines for any signs of wear that could result in problems while operating.

    It’s best to run the sprayer at a minimum of 5 bar to check for leaks. Also check the spray tank is fixed down securely, all straps and bolts are tight.

    Boom checks

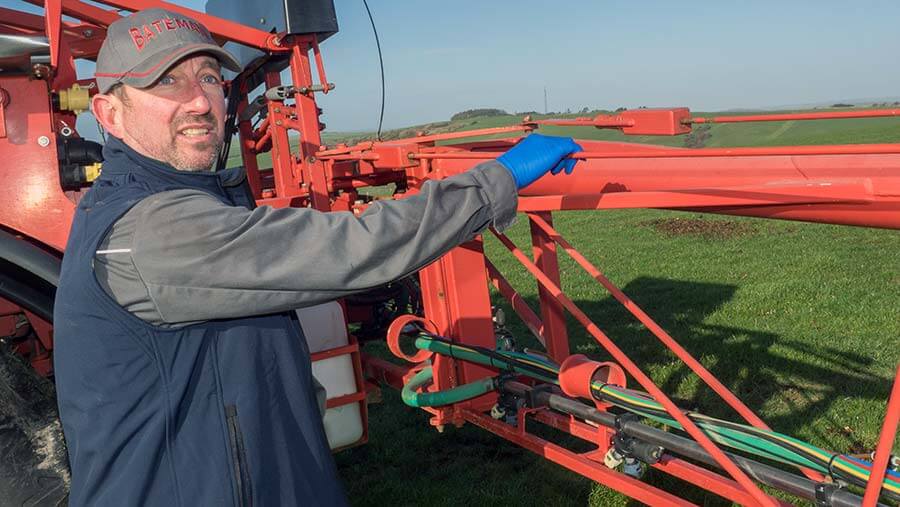
    Once opened out, check the boom has good movement in the x- and y-axis. All machines are different so check with your manufacturer as to how the boom is set up. Mr Robertson’s Bateman has tie rods and stock bots that can be adjusted to set the boom up to ride well.

    Check the tie rod nearest the back of the machine is slightly loose when moving and that the front rod is tight. Next, check for up and down movement by gently pushing the boom down by about 50cm and letting go. The boom should return to the central position without too much bouncing around.

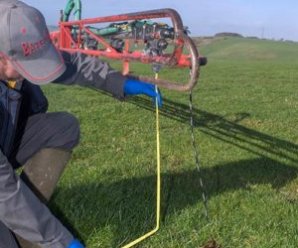
    “We want a little bit of movement but not excessive so that you can ride over the bumps as you go along without over- and under-dosing the crop,” says Mr. Robertson. Boom height is one of the most critical factors when spraying and the ideal height is 50cm above the crop. One of the easiest ways to work this out is by using a cable tie that is cut off at the correct length to use a visual aid from the sprayer cab.

    Don’t forget to measure from the tip of the nozzle to the crop, not the spray line.

    Good sprayer cleanliness is important, so make sure the system is rinsed through at the end of each day with clean water to make sure there’s no residue left in the boom. If your machine’s boom doesn’t have recirculation, remember to take the end caps off occasionally and flush out the whole boom.

    Nozzle checks

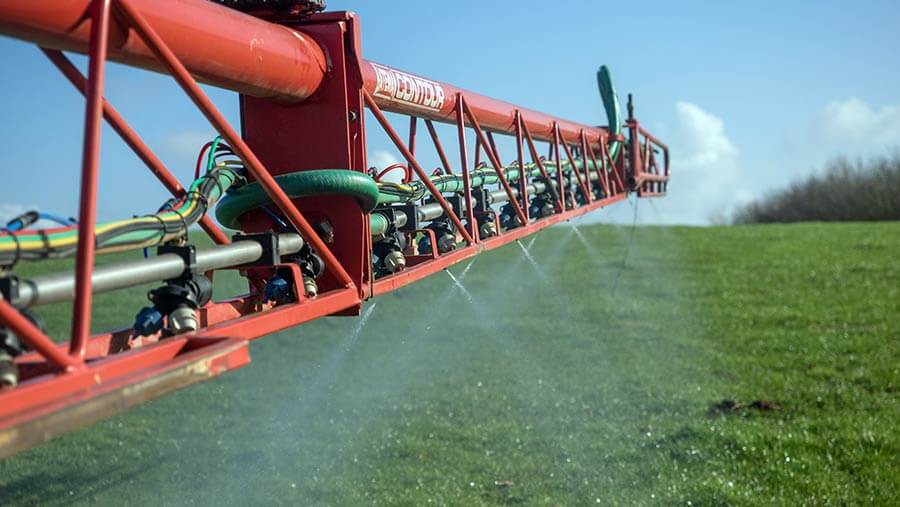
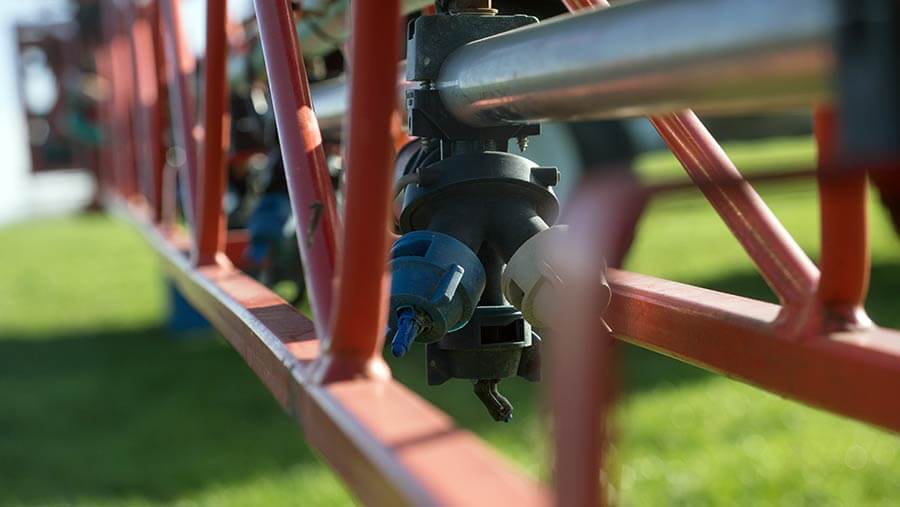
    Check that the nozzles are aligned both vertically and horizontally, according to the NSTS guidelines. Loosen clamps to adjust any nozzles that need realignment.

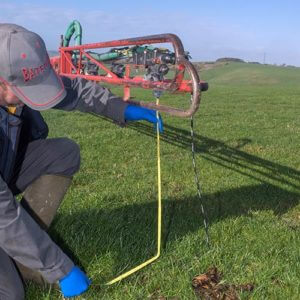
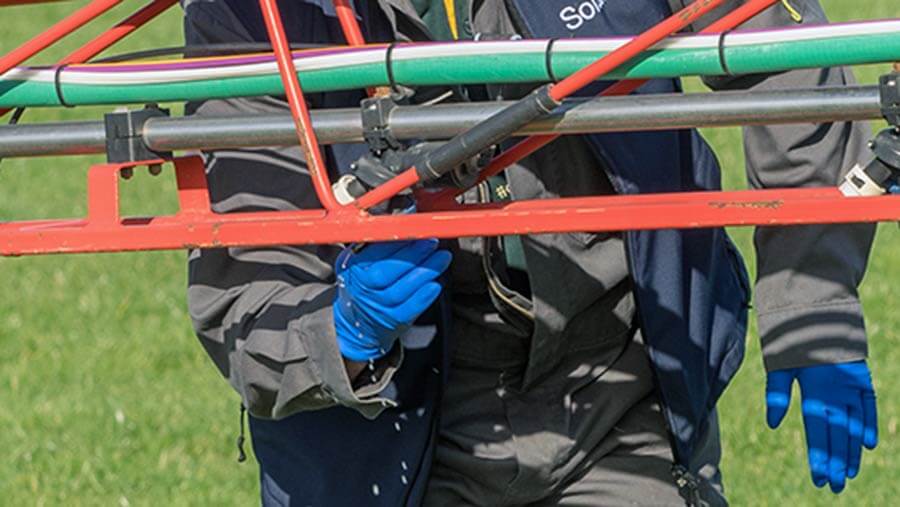
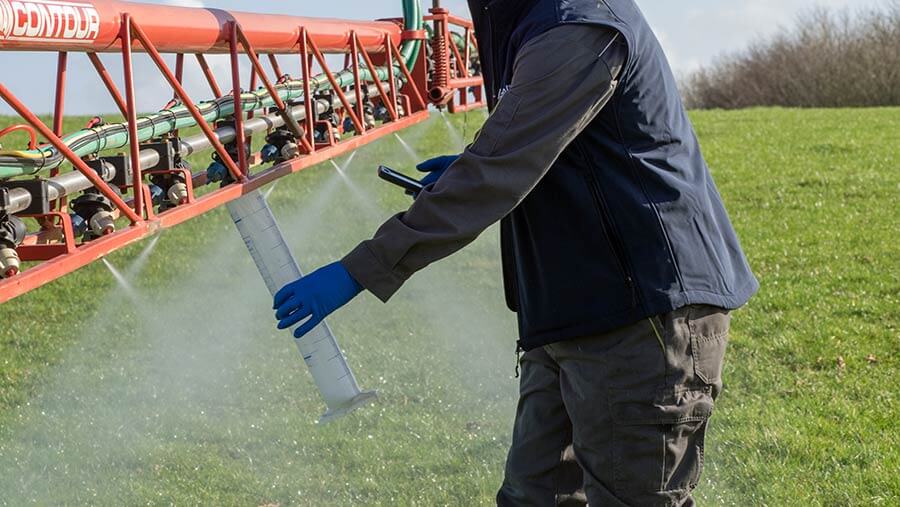
    Check the nozzle output at least twice a year by running the sprayer with clean water at 3 bar pressure. Time the output of each nozzle for 30 seconds. If nozzles have been used previously, it’s best to check their output against that of a new pair. Mr Robertson advises using a measuring cylinder rather than a jug to measure the flow rate as a jug is less accurate “because you get a bigger variation over the wider surface area”.

    With an 03 nozzle running for one minute at 3 bar pressure, the output should be 1.2 litres/minute as a rule of thumb but refer to the nozzle manufacturer’s output chart for the expected flow rate. “An easy way to remember this is: at 3 bar your nozzle size multiplied by four will give you your target litres/minute output. It works for all nozzle sizes.” If the output varies more than 4% of the average, or if the spray pattern visually doesn’t look correct, you need to change the nozzle set.

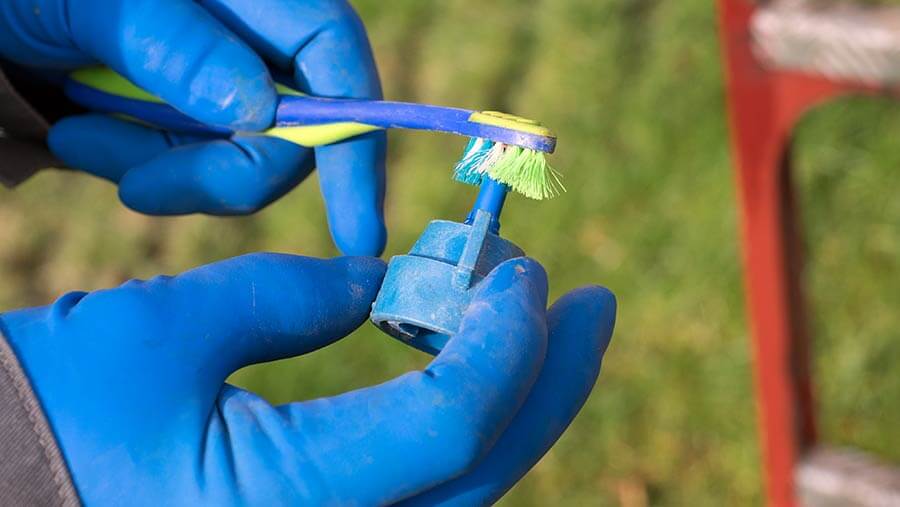
    After checking the output, cross-reference this figure with the rate controller – you may need to adjust the flow figures to ensure that the two correlate. If a nozzle becomes blocked while spraying, Mr. Robertson says he will swap it for a new one and then clean it later using a toothbrush or airline. Never blow through a nozzle with your mouth.

    Nozzle choice

    The choice of nozzle is highly dependent on the sort of job you’re doing. “Timing is crucial but using the right nozzle at the right time will make the job so much easier, cut drift and mean that you’re getting more of the product where you want it to go. If you aim at it you will hit it,” says Mr. Robertson.

    His nozzle of choice is an 03 size and he prefers to use the Defy 3D nozzle alternated forwards and backwards across the boom for pre-emergence work and T0 applications as well as the T3 ear spray. “In less than optimum conditions I may prefer to use the Amistar/Guardian Air, a fine induction nozzle. I would use this at T1 and T2 and also in sub-optimum conditions.”  This nozzle has a 3-star Local Environmental Risk Assessment for Pesticides (LERAP) rating and is 75% drift reducing.

    A water volume of 100 litres/ha is a good rate for spring fungicide application. It provides enough coverage for good disease control and allows maximum efficiency from the sprayer.

    Forward speed

    The third and final part of reducing spray drift is forward speed. Depending on nozzle size and water volume, aim to travel at 12kph.

    Mr Robertson says he finds that this speed gives a good overall output and means you don’t get shadowing or turbulence behind the machine.

    Tips and tricks

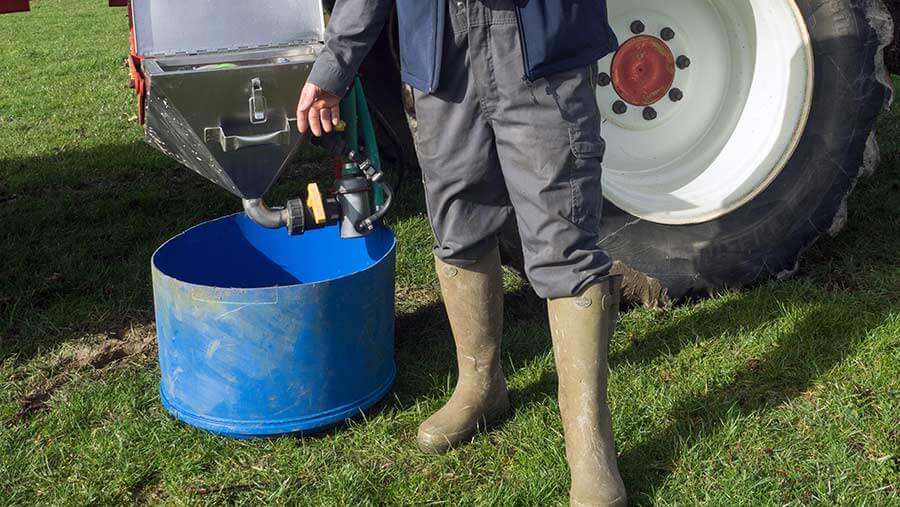
    One of the biggest risk of contamination is at fill up. “A fantastic, cheap trick that I learned through Farm Sprayer Operator of the Year is to take a 200 litre plastic drum and cut it in half to create two drip trays to catch any spillages under the induction hopper and the tank overfill.” This eliminates point source contamination, he says.

    “Finally, there’s a plethora of information out there on the internet, loads of good apps to download. The technology is there to help us do the best job possible and make our job as safe as possible.”

  • Nozzle Selection for See & Spray Select Spot Sprayers

    Nozzle Selection for See & Spray Select Spot Sprayers

    Spot sprays are becoming mainstream. As of 2024, John Deere’s See & Spray Select, their Green-on-Brown technology, is selling well in western Canada but it’s creating some confusion about how to outfit and run the system.

    Quick Overview:

    See & Spray Select is available on 120’ booms with either 15” or 20” spacing. It can be operated at up to 12 mph with conventional vertically oriented nozzles, or up to 16 mph with backwards oriented nozzles using a 40º adaptor available from John Deere. Optimal boom height is between 26” and 47”

    Operating speed for See & Spray Select is measured at the boom. That means if an operator drives at the 12 mph limit and the boom yaws forward under normal driving or in a turn, the boom speed will exceed 12 mph and it will enter “fallback” mode. Fallback mode is intended to provide weed control when camera vision is compromised due to dust, height, or speed, and typically it means that all the nozzles in the affected boom region are turned on. To avoid unnecessary waste, an operator will want to minimize fallback mode and therefore will want to drive slower than the maximum allowed boom speed.

    An operator has a choice of selecting a single-nozzle or overlapping-nozzle activation. In single nozzle mode, only the nozzle in the weed’s lane is turned on. In overlapping mode, one adjacent nozzle on each side is also turned on, for security. Overlapping mode is available on most spot spray systems to compensate for spray displacement in a side-wind, for example.

    Research at the University of Wisconsin has shown that the overlapping mode resulted in more consistent weed control in a side-wind.

    Nozzle Selection

    Overlapping mode makes nozzle selection easier because the fan angle is not as critical. Nozzles are allowed to overlap as they’re supposed to on a broadcast boom, and the spray dosage is a function of nozzle size, spacing, and travel speed. It’s also easier because boom height movement doesn’t affect the dose, so long as the required overlap remains. But nozzle fan angles should still not be too wide.

    Single nozzle activation can save more product. But in this mode, nozzle fan angle is critical because it determines the band width. Unfortunately, current nozzle selection is poor – most manufacturers aren’t offering any narrow-enough fan angle nozzles yet. For this reason, John Deere’s nozzle recommendations are intended primarily for overlapping mode.

    With single nozzle activation, the nozzle pattern (band) width needs to be fairly close to the nozzle spacing, but still have some overlap when adjacent nozzles are activated in a weed patch. The more the pattern width exceeds the nozzle spacing, the greater the underdosing in single nozzle activation compared to overlapping sprays. This conundrum is unavoidable. The closer these two values (pattern width and nozzle spacing) are to each other the better. But for this to work, boom height has to be consistent. Too low a boom creates gaps between adjacent narrow patterns. Too high and the pattern width widens, reducing the single nozzle dose. There is simply not much room for error.

    Broadcasting Background Dose

    With See & Spray Select, the A solenoid (front nozzle in ExactApply) can be used to apply a PWM broadcast spray simultaneous to the spot spray. This feature is useful with early season application because of just-emerged weeds that may be missed by the sensor. We might choose about 1/3 of the full rate applied this way, a dose which is sufficient to control these small weeds. With a tank mix for 10 gpa, one would spray 3 gpa with the front boom and 7 gpa with the B solenoid, the spot spray. This way the entire field receives the 3 gpa dose, while larger weeds that trigger the spot spray receive the 10 gpa dose.

    The problem is again with nozzle availability. For example, 3 gpa with 15” spacing at 11 mph with PWM (broadcast mode) requires a small nozzle such as an 01 (orange) or 015 (green). These are hard to find in a low-drift version. Increasing the broadcast water volume to 5 gpa would allow an 02 (yellow) nozzle to be used. A 20” spacing would allow even larger nozzles to be used, for 3 gpa an 025 (lilac) is a possibility and this greatly improves the available choice. At 5 gpa, an 03 size is suitable, and now the John Deere LDM nozzle is an option (it is not manufactured in sizes smaller than 03).

    Let’s assume a user selects 5 gpa for the broadcast based on nozzle availability. The next decision is whether to adjust the total applied volume upwards. If sticking with a 10 gpa tank mix, the spot spray would also be 5 gpa, making the broadcast 50% of the dose.  

    Alternatively, one could increase the spot spray volume to 10 gpa, mixing the tank for 15 gpa. This returns one to 1/3 of the total dose as broadcast, and 2/3 as a spot spray.  A reason for doing this is to make nozzle size selection easier and also improving the product savings of the system.

    The spot spray from the B solenoid is not PWM, which allows for a more straightforward nozzle sizing, as well as the use of air-induced tips which are available in a large number of sizes.

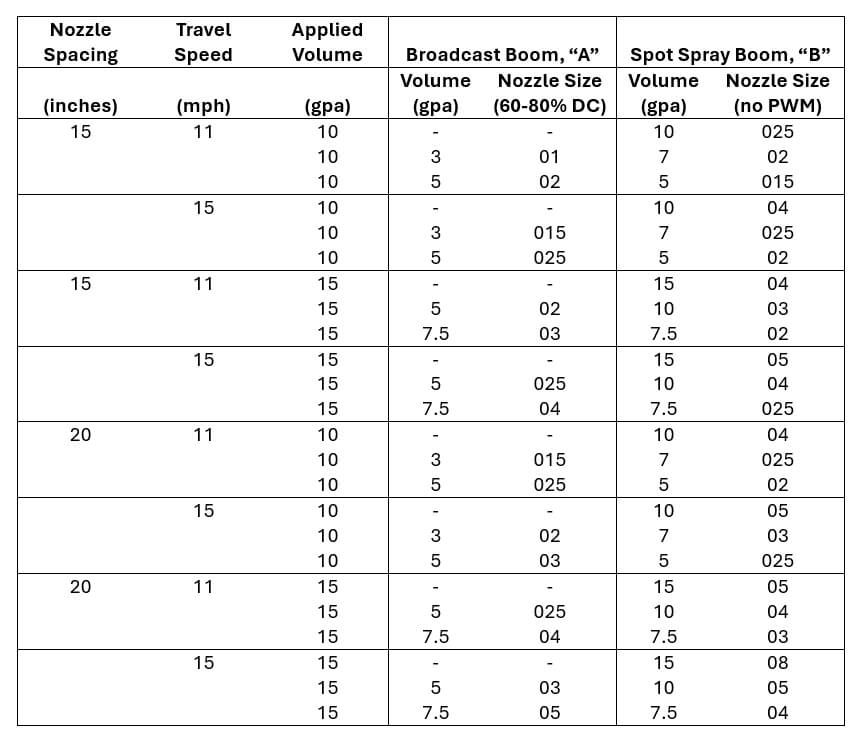
    A summary of some possible nozzle combinations for two nozzle spacings and travel speeds is listed in Table 1.

    Table 1: Possible nozzle sizes for overlapping mode in John Deere See & Spray Select Note that the travel speed is lower than the maximum allowed, to accommodate boom yaw.

    If the operator chooses single nozzle activation, the fan angle of the nozzle becomes important. To recap, one would want to have a nozzle that can do two things:

    1. Cover a band that is close to the same width as the nozzle spacing when a single weed activates a single nozzle, and
    2. Provide sufficient overlap when multiple adjacent nozzles are activated in a larger weed patch.

    It’s not possible to have a band width as narrow as the nozzle spacing and still get an overlapping pattern when it’s needed. This means the dose for a single nozzle pattern will unavoidably be spread out wider, resulting in a lower dose for any weed it encounters compared to the overlapping activation. But the wider the fan angle, the wider the band and the lower the dose, resulting in possibly reduced control for single nozzle activations.

    On the other hand, a narrower band limits the boom height at which an acceptable overlap can be achieved. Let’s say an overlapping nozzle needs to have 30% overlap to get an acceptable spray distribution. At a 20” spacing, the band would need to be 26” wide (a 24% under-dose on a single nozzle compared to an overlapping section).  Band width will change with boom height, but it depends on the fan angle. For a 60 degree fan angle, the band changes by about one inch for every inch of boom height. That means even with a modest 10” vertical movement of the boom, the dosage might change by 30%, a fair amount.

    Actual changes depend on the nozzle spacing and the fan angle, but the point remains that this is a significant dosage change that could affect weed control. And this change in dose is because of boom sway.

    Recommendations

    What should a spot spray user do?  One thing is clear, compromises will be necessary.

    The most consistent application will be achieved with overlapping mode, but at the cost of forfeited savings. These lost savings may be recovered due to fewer weed control failures, or less need to re-spray.

    On the other hand, the greatest savings will be achieved with single nozzle activation. But fan angle will need to be carefully selected and boom height consistency will be critical.

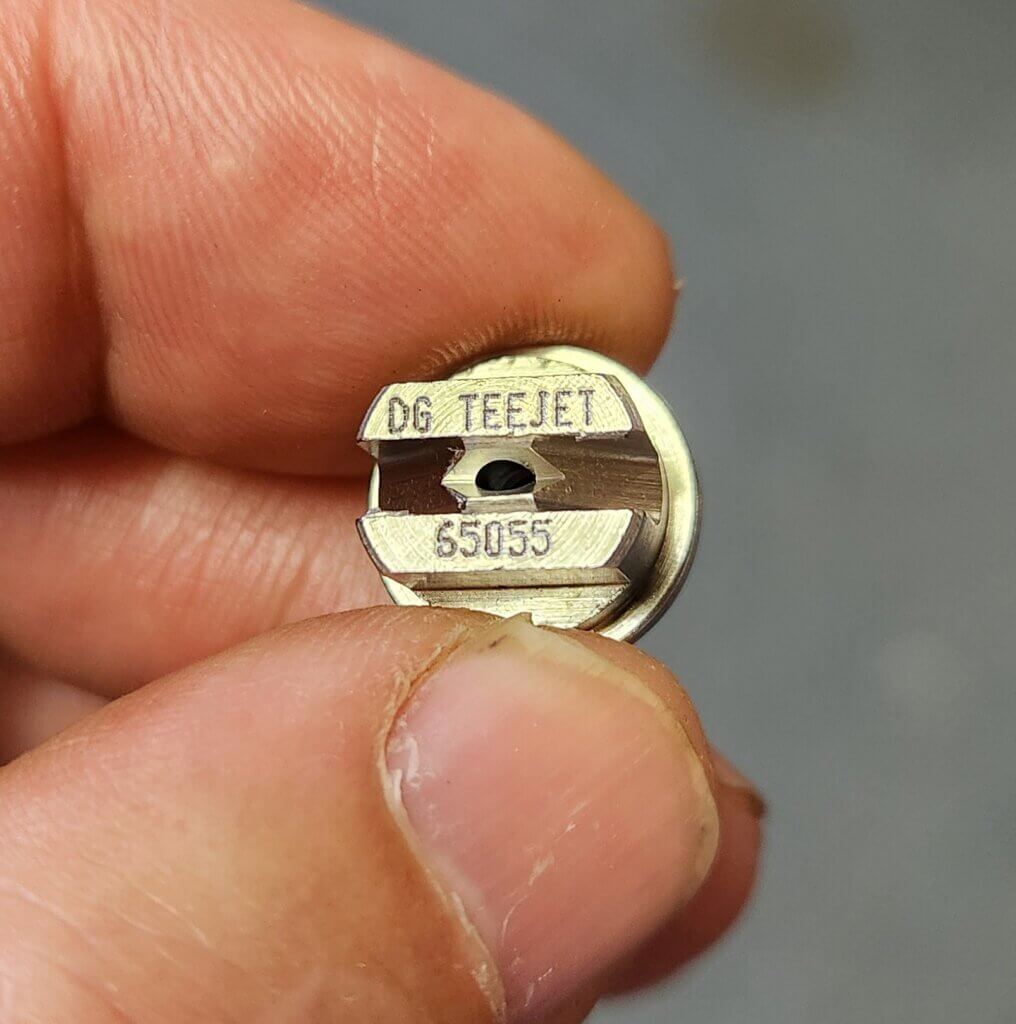
    Availability of narrow fan angles is limited. Only Wilger (20, 40, and 60 degree DX), Greenleaf (40 degree Spot Fan), Arag (CFLD-CX 40 degree) and Magnojet (30 and 60 degree) offer spot spray-specific low-drift nozzles off the shelf. TeeJet has issued DriftGuard (DG) versions of 65 degree nozzles for the Australian spot spray market, with the DG65055 a special nozzle that conforms to the VC spray quality requirement needed for 2,4-D products.

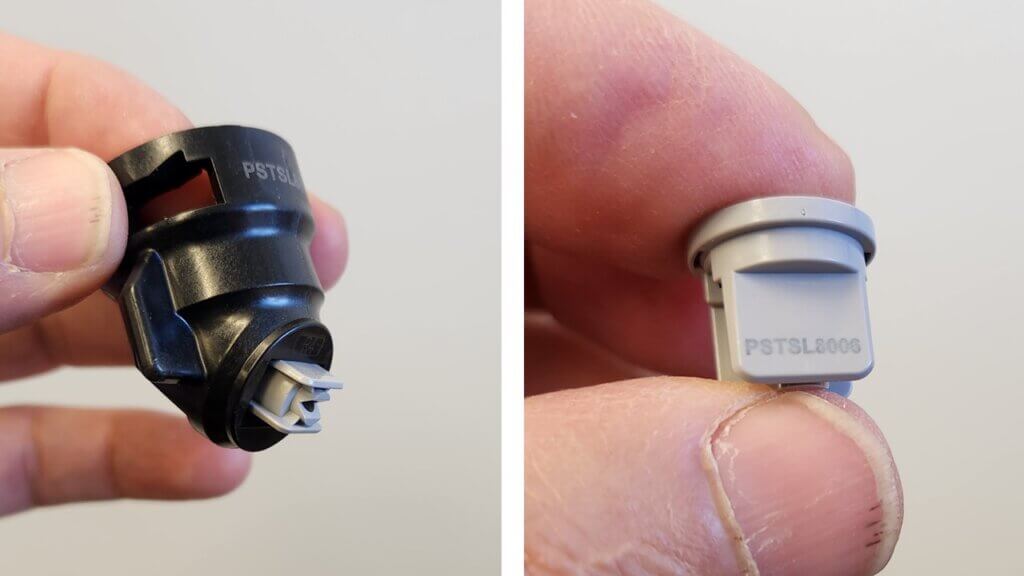
    John Deere has recently (Spring 2025) released an 80 degree spot spray tip called the TSL. It ships with the angled adaptor for faster spray speed. However, 80 degrees is still not narow enough to permit single nozzle activation without some significant rate compromises between single and overlapping mode.

    The availability will need to increase, not only in terms of fan angles, but also in flow rates and spray qualities. With spot sprays remaining a relatively small market this will take time. But the success of spot sprays also depends on it.

    One question that only experience will answer is the relative frequency of single vs multiple nozzle activation for any given farm. If the majority of the activations are multiple nozzles, then setting up the nozzles for that situation (i.e., opting for wider fan angles that create more overlap) makes most sense.

    But regardless of the choice made by the user, the need for stable booms remains paramount. This feature will be the basis on which any progress in spot spray adoption will be built.  Call your dealer. Tell them how important boom stability is.

  • Greeneye makes impressive debut

    Greeneye makes impressive debut

    Green-on-green sprayer competes with Blue River and Bilberry

    One distinguishing feature of the new agriculture is the rapid development of new technologies. Ideas move from concept to implementation at record pace, helped by an influx of talent and capital into this profitable sector.

    Greeneye Technology is an example of this pace. Founded by entrepreneurs who met in the Israeli armed forces, they developed a software platform that identified crops, weeds, and other objects in agricultural fields from drone imagery. They recognized the opportunity to transition their software to a sprayer platform, and in 2017 decided to join the race, most notably competing with Blue River, Bilberry, Carbon Bee, and Xarvio, to create a green-on green spot sprayer.

    Greeneye, in an amazing display of efficiency and speed, has been a commercial product for approximately one year in the US and has sold several units in Nebraska, Minnesota and Oklahoma, and next year will expand to North and South Dakota, Iowa, Illinois, Kansas and Texas. Having consulted for the company in its early years, I paid a visit to Peterson Farms Seed near Fargo, ND in early July 2023 to see the sprayer first hand at a field demo. By the way, kudos to PFS for bringing this technology to their customers to see. Have to love a business so committed to the cutting edge.

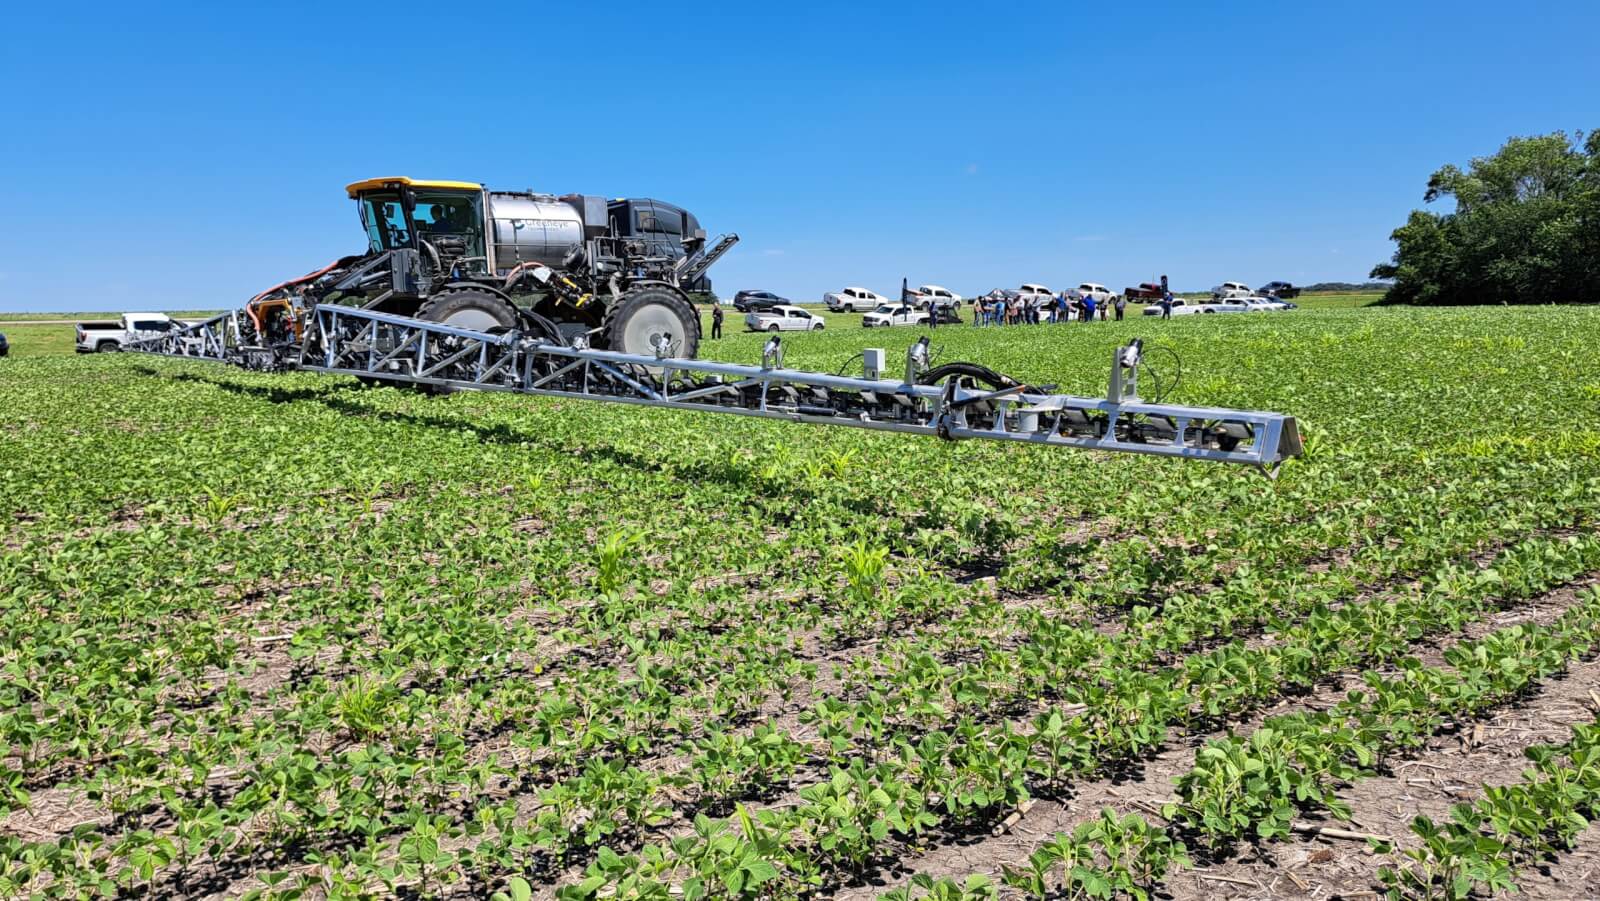
    Figure 1: The Greeneye system was mounted on a Hagie STS 12 sprayer.

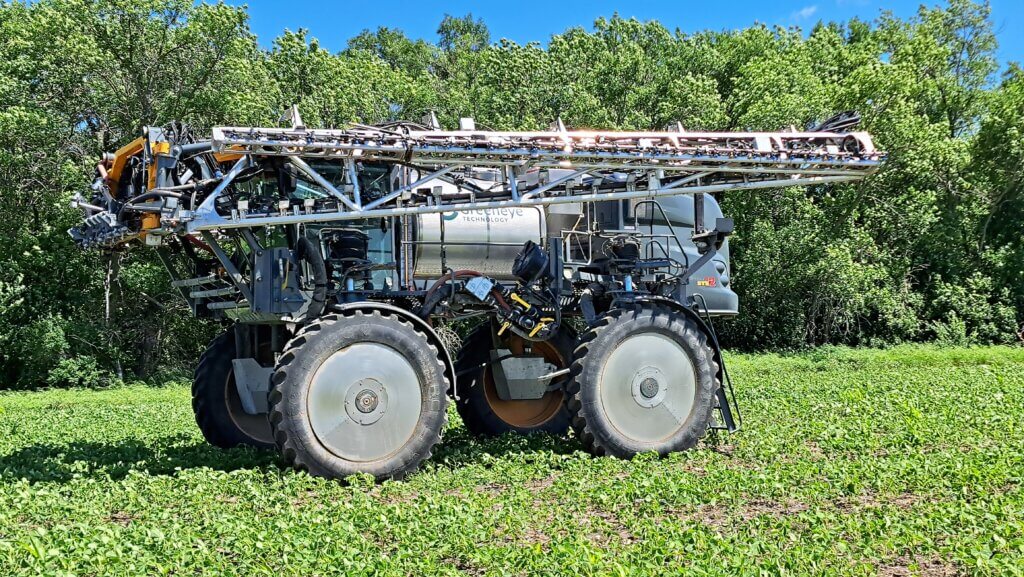
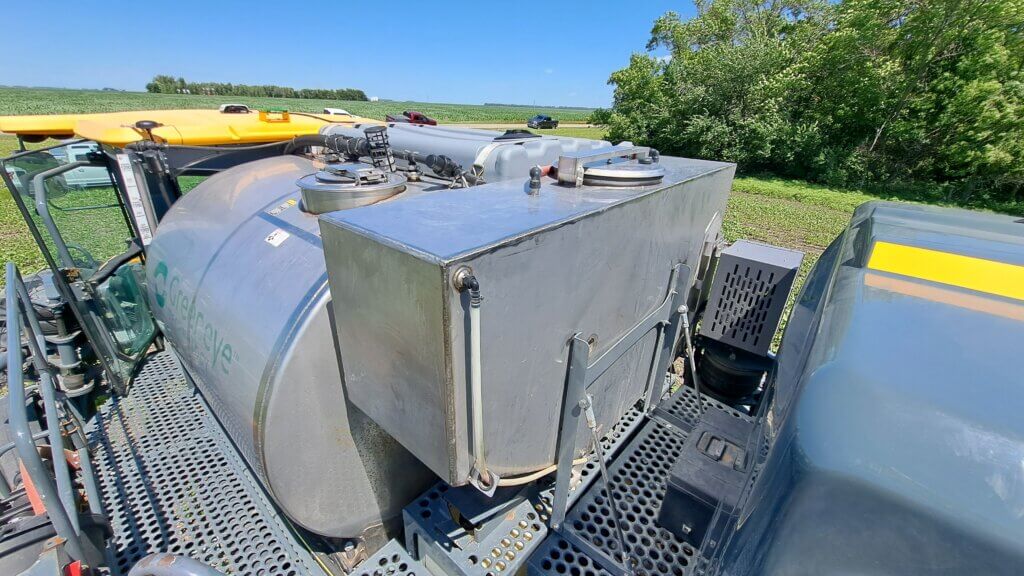
    The Greeneye system was mounted on a Hagie STS 12 sprayer (1200 US gallon tank) with a custom 120’ boom manufactured for Greeneye by Millenium. Recognizing the agronomic need to broadcast pre-emergence herbicides along with a post-emergent spray, they company retained the existing plumbing system (tank, pump, wet boom) for this purpose. They added a smaller spot spray tank (240 gallons) with its own pump and wet boom for spot spraying.

    Figure 2: A smaller spot spray tank was added to the Hagie. If necessary, spray mix can be pumped from the larger tank to this smaller tank.

    This approach permits the flexibility of broadcasting a pre-emergent herbicide during burnoff alongside a post spot spray on emerged weeds. The agronomist in me likes this a lot. Broadcast pre-emergent herbicides are an important part of resistance management, particularly in the US.

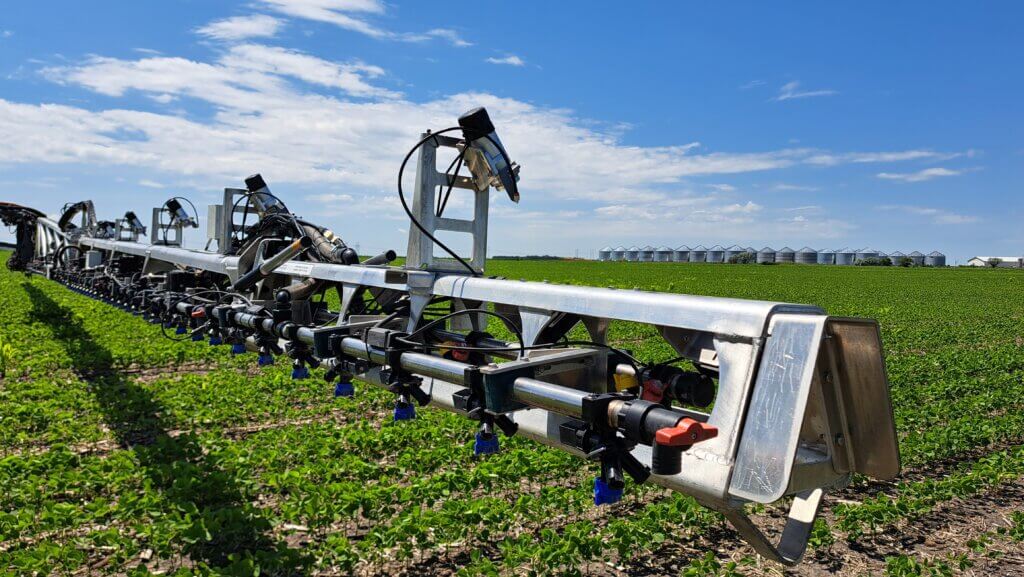
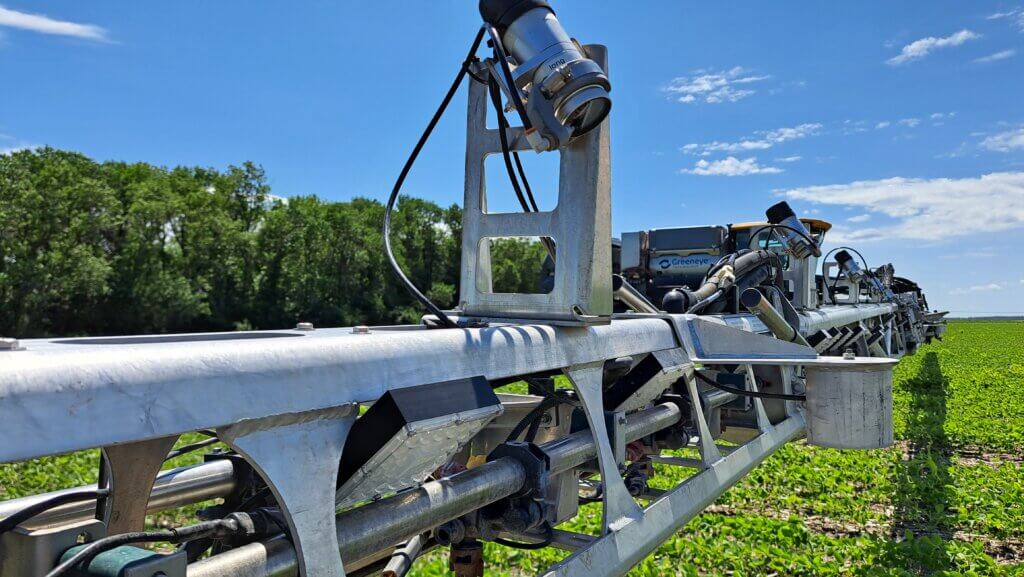
    Figure 3: The second (spot spray) boom is mounted behind the factory wet boom.

    The new wet boom has a nozzle spacing of 10”, is fitted with three-nozzle-turret TeeJet bodies. The 10″ spacing allows for higher resolution of the spot spray, increasing potential savings compared to a 20″ spacing.

    Figure 4: The spot spray nozzles are mounted at 10″ (25 cm) spacing.

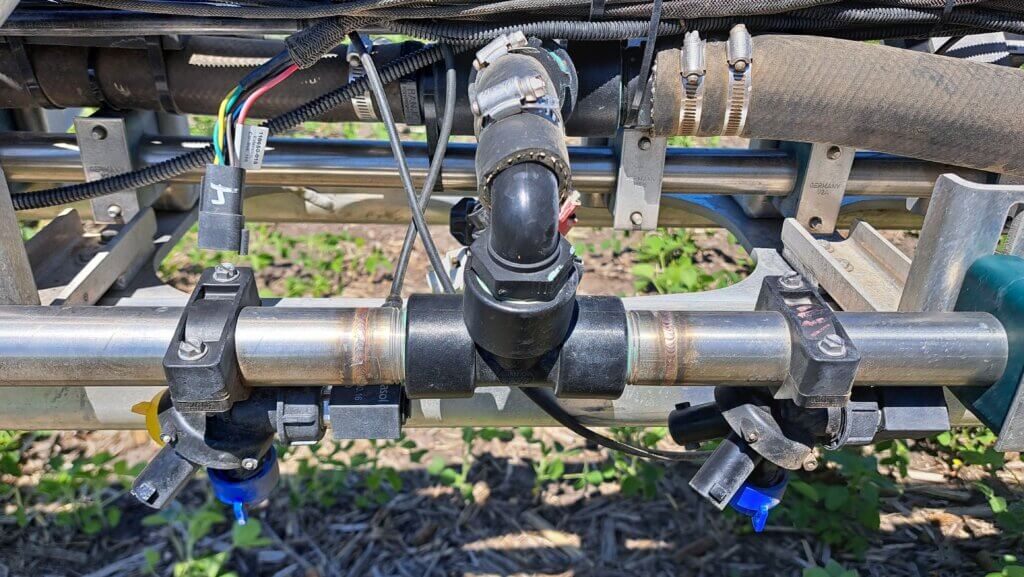
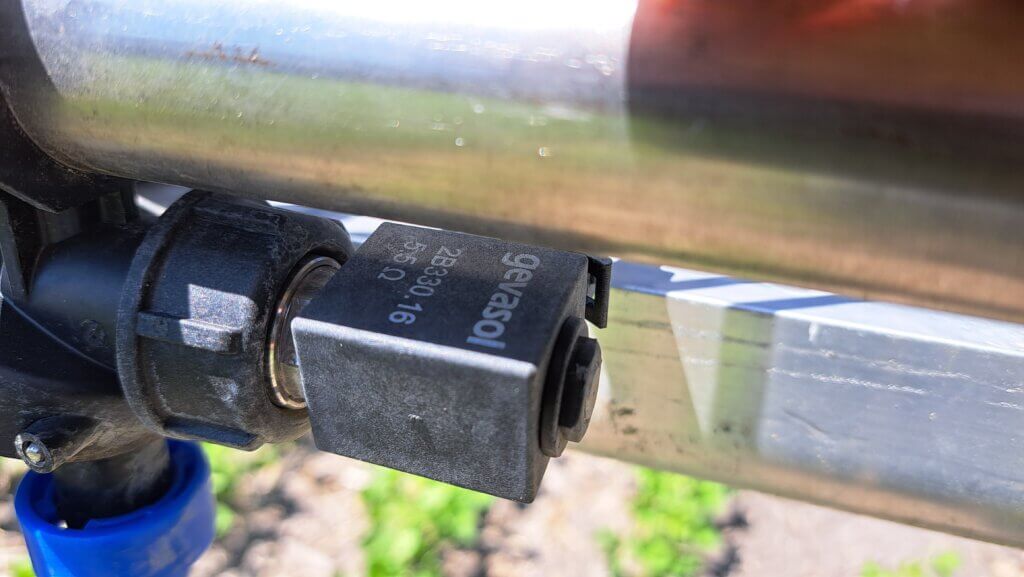
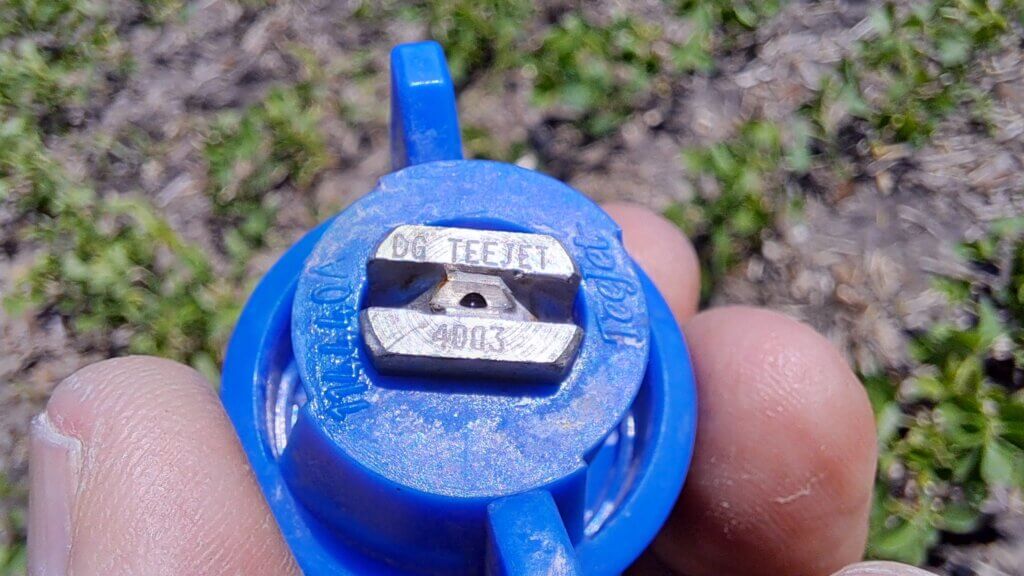
    The spray was metered through custom-made TeeJet DG4003 tips using Gevasol solenoids running at a speed-dependent frequency, maximally 100 Hz, with turn compensation.

    Figure 5: Solenoids activate the spray when a weed is detected in that nozzle’s lane.

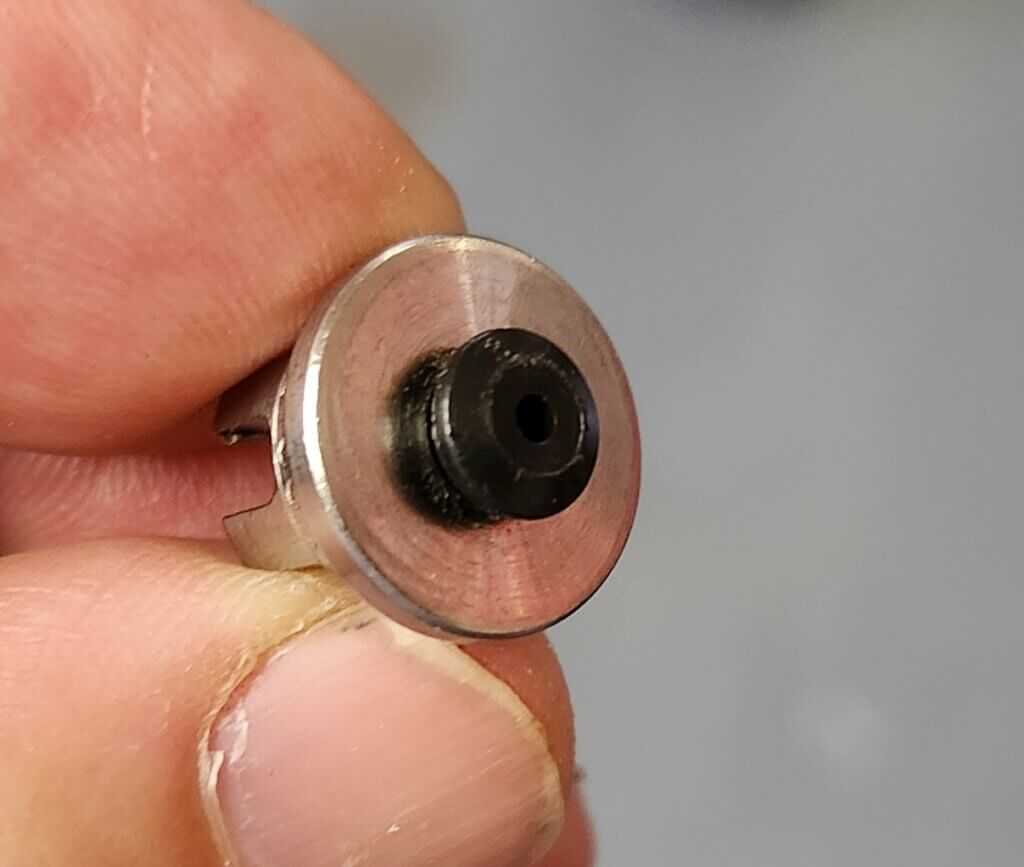
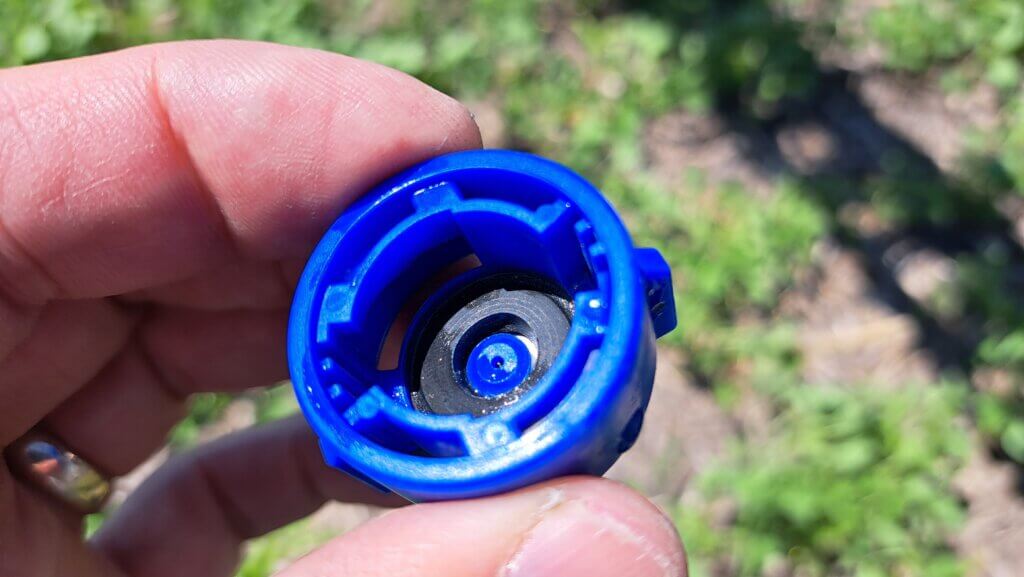
    DG Nozzles use a pre-orifice to meter the flow at the rated amount, with an exit orifice slightly larger. This creates a pressure drop, resulting in a lower drift spray.

    Figure 6: These Drift Guard nozzles are custom-made for Greeneye by TeeJet.

    Figure 7: The blue DG pre-orifice meters the flow at 0.3 US gpm at 40 psi.

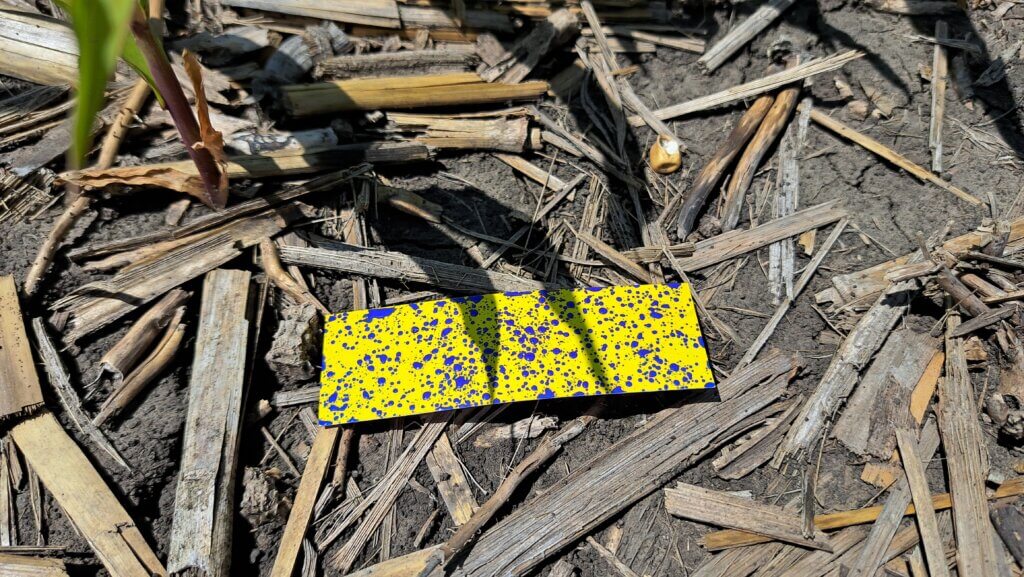
    Looking at the spray quality and coverage on water-sensitive paper I thought the deposit looked just right. Spot sprays shouldn’t be too fine for risk of displacement from their intended band. We’re not seeing bundled nozzles with other spot spray systems, who leave nozzle selection to the operator. That can pose difficulties and possibly forfeit either weed control or savings.

    Figure 8: The spray deposit shows adequate coverage and a good droplet size distribution for good placement accuracy.

    Sectional control retains the plumbed resolution at this time, although nozzle-by nozzle resolution is in the pipeline. Cameras are mounted at 1.5 m intervals and can run up to 50 fps.  Camera resolution is proprietary, but the company claims that weeds as small as ¼” diameter can be detected. In its current configuration, weed diameters of 1” are detected, leaving smaller weeds for the pre-emergent products. LED lights flash to illuminate the camera field of view, improving image consistency and permitting the system to run at night. The Greeneye system analyzes a captured image just once to make a spray decision, and does not use segmentation in its algorithm.

    Figure 9: The camera and lights look ahead to provide the necessary time for the on-board computer to make the required calculations that determines the plant’s identity. Note the aspirated lens cleaner.

    Like its competitors, the user can select from individual nozzle activation or, in “windy mode”, the addition of the adjacent two nozzles to create a three nozzle broadcast. The length of the band is automatically selected by the software, with no user input available. Sensitivity adjustments are currently by request to the factory, but will be available for operator control in 2024.

    Greeneye provides its own cab monitor that works with the sprayer monitor on sectional control. The Greeneye monitor keeps track of the spray volume usage and provides an ongoing report to the operator.

    The software is able to report back whether a detection was a grassy or broadleaf weed, a powerful piece of information for keeping track of weed patches and monitoring for emerging problems. Weed maps are already being produced as a proprietary tool, and will be generally available in 2024.

    New Greeneye customers have their sprayer picked up at the yard and transported to Greeneye facility where the new boom, tank, and digital components are installed. The customer receives the converted sprayer, calibrated and ready to go.

    In my judgement, the install was clean and tidy. Camera mounts are welded on, and an air jet can be used to keep the lenses dust free. Brackets for the GPU and other control boxes are unobtrusive, although the wiring does get a bit crowded in places. Everything is accessible.

    Cost is $239,000 US at time of printing (July 2023). This gets the customer a Greeneye system for a 120 foot boom, a brand new aluminum boom, retrofit of the sprayer to dual tank, installation and warranty. Return on Investment (ROI) for a spot sprayer will depend on farm size and herbicide use. Based on observed savings to date, Greeneye estimates that for a farm larger than 3,000 acres the ROI would typically be less than 2 years.

    Greeneye does not charge subscription fees for its algorithms. This last aspect is interesting as John Deere and Bilberry both charge for use of their algorithms on a per acre basis. John Deere, for example, charges $3/acre US for corn, and $4/acre for soybeans and cotton, each time you make a spot spray pass with See & Spray Ultimate.

    Available Greeneye algorithms are for Green-on-Brown, and Green-on-Green in corn and soybeans as of July 2023. Cotton and milo will be available in 2024, and Greeneye is working on canola and wheat as well. Like Bilberry, they capture images from the cameras for use in algorithm learning, and accuracy and hit rate should be improving with time. Travel speeds of 15 mph are working well according to Greeneye.

    As for performance, the proof will be in the pudding. The company in its wisdom did commission an independent evaluation at the University of Nebraska, Lincoln, and has made a summary of the university report available on its website. According to UNL, broadleaf weed control in corn with the spot sprayer was equivalent to the broadcast treatment, and grassy weed control was slightly less effective. UNL researchers noted herbicide crop injury (“Status”, dicamba + diflufenzopyr) was reduced with the spot spray. Of course, savings will be a function of weed density and the detection threshold chosen by the operator, but the addition of reduced crop injury resulting in greater yields could also be very valuable.
    A recent investor and business partner is Farmers Business Network (FBN). FBN sees the opportunity for a spot sprayer to act as a scouting platform that helps evaluate the success of new pest management strategies.

    Support on the ground is in the form of US staff with backgrounds in the spraying industry. Software development and digital troubleshooting remains in Israel.

    Although I no longer have business links to Greeneye, I was happy to see this sprayer operating as well as it did. I remain convinced that spot sprays will be an essential part of our spraying future, for sustainability and resistance reasons. It is heartening to see these early successes and it will be interesting to see them continue to evolve.