Tag: calibrate

  • Sprayer Math for Banded Applications

    Sprayer Math for Banded Applications

    Where crops are planted in rows, growers can save on chemical costs and reduce potentially wasted spray by performing banded applications. A banded application is treating parallel bands (Figure one), unlike a broadcast application where the entire area is treated (Figure two). This means only a portion of the field or orchard/vineyard floor receives spray, so the total amount of product applied per hectare (or per acre) should be less for banded than for broadcast.
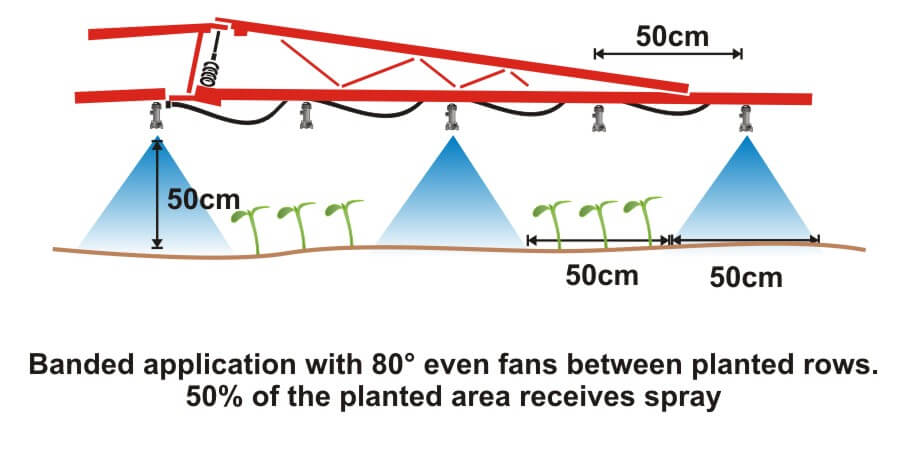
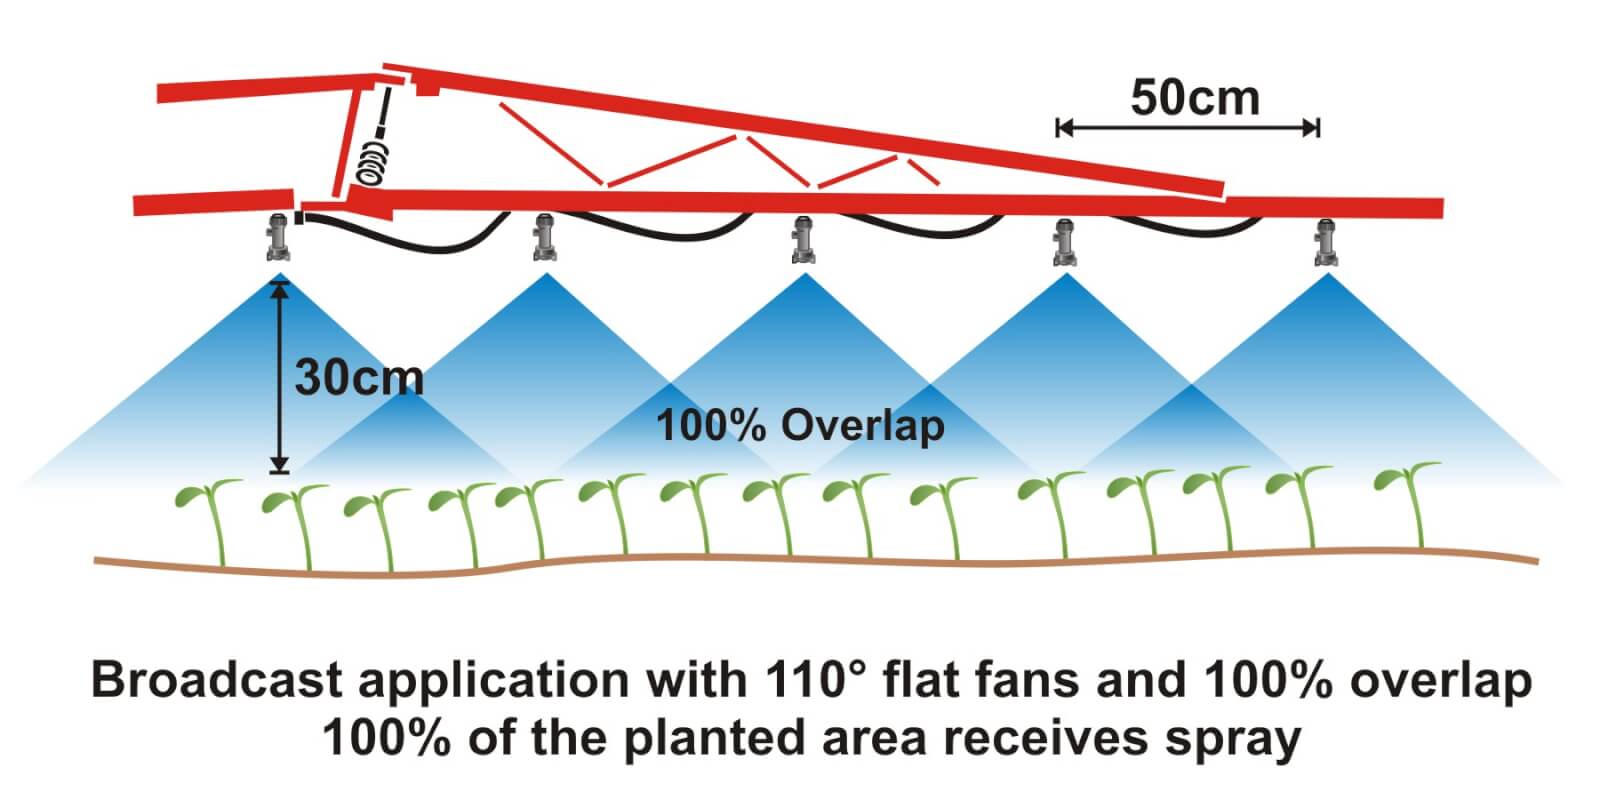
    Figure 1
    Figure 1
    Figure 2
    Figure 2

    Banded applications are used in many situations, including:

    • Applying herbicides right over a crop during planting, both for pre-emergent or post-emergent crops.
    • Applying insecticides/fungicides by “directed spraying” using drop hoses or row kits; the latter is pictured in Figure three.
    • Carefully spraying herbicide between the rows to control weeds in the alleys of an established crop (Figure one).
    • Applying herbicide under fruit trees or grape vines to control weeds (Figure four).
    Figure 3
    Figure 3
    Figure 4
    Figure 4

    It’s easy to make mistakes when calculating product rates for banded applications and these can be costly errors: too little means poor control and too much means wasted product and possible crop injury. This article describes how to calculate sprayer output and product rate for common banded applications.

    Step One: Determine broadcast volume

    Pesticide labels typically list broadcast product rates (e.g. amount of formulated product per hectare or acre). In this example, let’s say the label recommends a broadcast product rate of 500 ml of formulated herbicide applied using 100 litres of spray mix per hectare (i.e. added to 99.5 L water).

    Step Two: Establish sprayer settings

    Select a travel speed that is safe, gives decent efficiency and doesn’t compromise coverage. For this example, we’ll say the sprayer moving is at 8.0 km/h.

    Select a band width that completely covers the target row and some of the adjacent area where control is desired. Band width should be measured along the ground for soil-applied products or along the top of plants for post-emergence products. We’ll use Figure one for our settings: bands are 50 cm wide on 100 cm centres. We’ll say that a single nozzle swath can treat the band, and that we’re spraying 2 hectares of planted area.

    Step Three: Calculate the banded sprayer output

    We can calculate how much of the planted area actually receives spray using this formula:

    [band width (cm) ÷ row width (cm)] x total planted area (ha) = actual sprayed area (ha)
    [50 cm ÷ 100 cm] x 2 ha = 1 ha

    For completeness, here’s the US formula:
    [band width (in) ÷ row width (in)] x total planted area (ac) = actual sprayed area (ac)

    From this we now know that we should be able to go twice as far on a tank spraying a banded application as we would a broadcast, because we’re only spraying half the planted area.

    Step four: Calculate the nozzle output

    Use the following formula to convert the broadcast output into the banded output:

    [broadcast output (L/ha) x travel speed (km/h) x (swath width (cm) ÷ number of nozzles per swath)] ÷ 60,000 = nozzle output (L/min)
    [100 L/ha x 8 km/h x (50 ÷ 1)] ÷ 60,000 = 0.67 L/min

    For completeness, here’s the US formula:
    [broadcast output (gal/ac) x travel speed (mph) x (swath width (in) ÷ number of nozzles per swath)] ÷ 5,940 = nozzle output (gal/min)

    If multiple nozzles were contributing to the swath, such as in figure three or figure four, this formula will account for it. You still mix the labelled product rate at a ratio of 500 ml of herbicide to 99.5 L water, but as we determined in step three, we should be able to spray twice the planted area using a banded application as we would a broadcast application.

    Warning! Watch your units. You may be familiar with other formulae for calculating your output. Do not mix and match formulae or parts of formulae. For example, here is another Metric option for determining L/min. It employs different units so it requires a different constant:

    [broadcast output (L/ha) x travel speed (m/min) x (swath width (m)) ÷ number of nozzles per swath)] ÷ 10,000 (m2/ha) = nozzle output (L/min)

    Step Five: Use the nozzle catalogue to find the right nozzle

    Using a nozzle manufacturer’s catalogue, select a nozzle that gives the desired spray quality (usually coarser for herbicides) and will produce the 50 cm swath we’re looking for (which can be adjusted a little using boom height). Always choose to operate a nozzle in the middle of its pressure range.

    Step Six: Calibrate the sprayer (i.e. double-check)

    Follow your typical calibration process and make minor adjustments until the nozzle discharge per minute results in the desired banded output. A rate controller will handle this on larger sprayers, but if you don’t have one you can make small adjustments to speed and pressure until the desired output is achieved. Ideally, if your math was right, these changes won’t be needed.

    When performed correctly, banded applications are a great way to focus your efforts on the target, saving time and money.

    Other Resources

    Download this booklet on spraying potatoes using banded rows. Or try our calculator:
  • Calibrating a Plot Sprayer for Airblast Crops

    Calibrating a Plot Sprayer for Airblast Crops

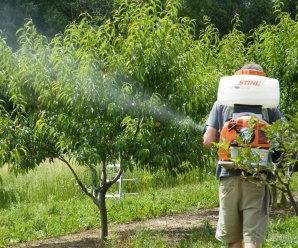
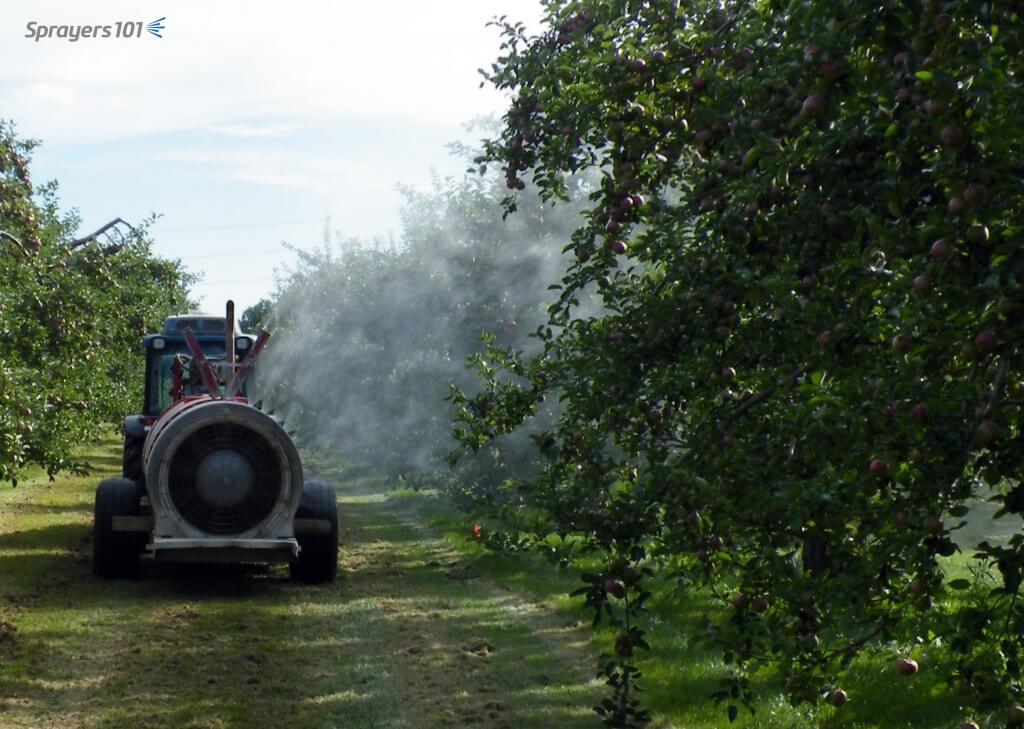
    The calibration of handheld plot sprayers is an important part of agricultural research, and this article already covers all the bases… as long as you are spraying broadacre or row crops. But what happens when you are trying to emulate an airblast sprayer and treating a tree, bush, cane or vine?

    The key difference is that spraying a two dimensional area requires the operator to pass the boom over the target at a uniform height and pace to achieve consistent coverage. But, a three-dimensional target requires the operator to circle the target, or spray from both sides, until it has received the required dose (or volume).

    In order to scale down a typical airblast carrier volume for small plot work, we need to know three things:
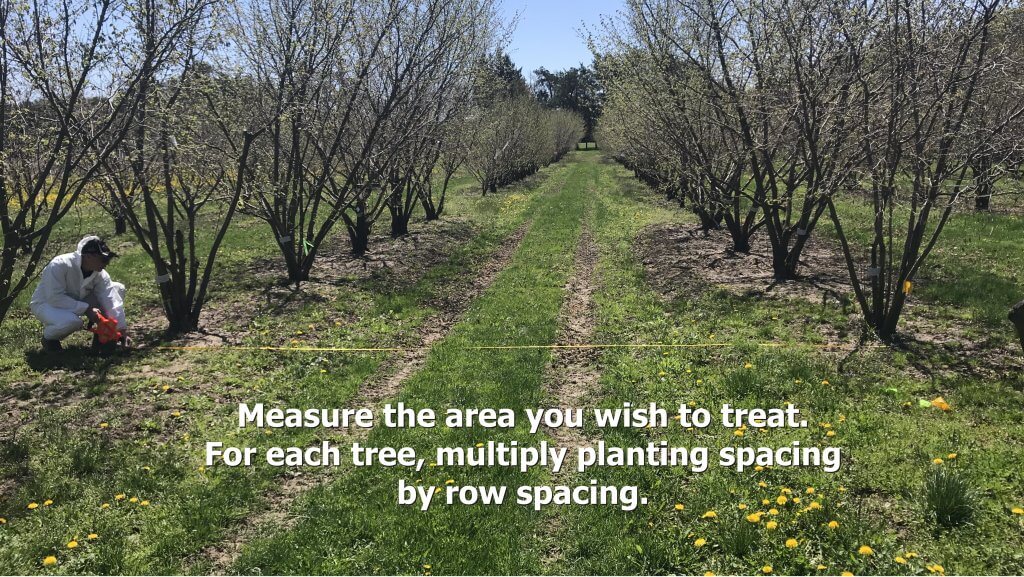
    1. The area you wish to treat (e.g. bush, grape panel, tree, etc.), including it’s share of the alley (in m2).
    2. The emission rate from the calibrated plot sprayer (in US gal./min.)
    3. The airblast carrier volume you wish to scale down (e.g. L/ha).

    The illustration below shows two options for calculating the treated area. Option A requires you to measure from the outermost edges of the canopy (imagine if the canopy was wet and dripping – the dripline is that outermost point). It is less consistent than the preferred Option B, where the area is determined from row centres and planting distance.

    Two options for scaling down an airblast carrier volume for small plot work. Both produce the same treated area, but Option B is the preferred method.
    Use the average planting distance and row spacing in metres. For a panel of grapes, use the centre of each panel as the planting distance.

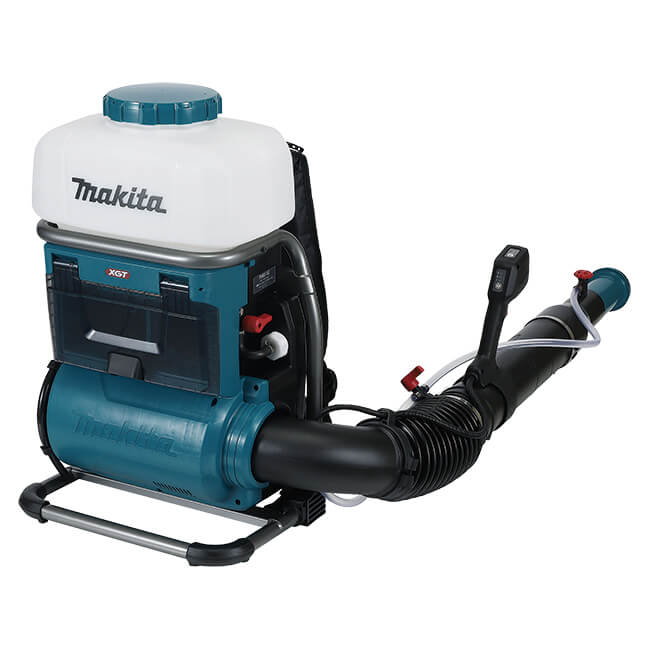
    If you are using a CO2 powered hand wand (preferred over a manual pump) with one or more hydraulic nozzles, then you can calibrate it using the methods in this article. There are battery-powered options from Jacto and Petra Tools, the latter offering a battery powered ULV system as well. Makita also has a battery entry (image below). However, if you are using a backpack mistblower, which better approximates an airblast sprayer compared to a hydraulic hand boom (see this article), it requires a different approach. Plus, you get to look like a Ghostbuster, which is a win in my book.

    PM001GL201 – 40V max XGT Brushless Cordless 15L Backpack Mist Blower (8.0Ah x2 Kit)

    Follow along in the following images as we explore how to calibrate a backpack step by step:

    When transporting a mistblower, use a loop of nylon cord to secure the boom in an upright position.
    For calibration, fill the completely empty sprayer with a known volume of water. If the boom is gravity-fed, be sure the feed valve is closed so the water doesn’t run out of the boom.
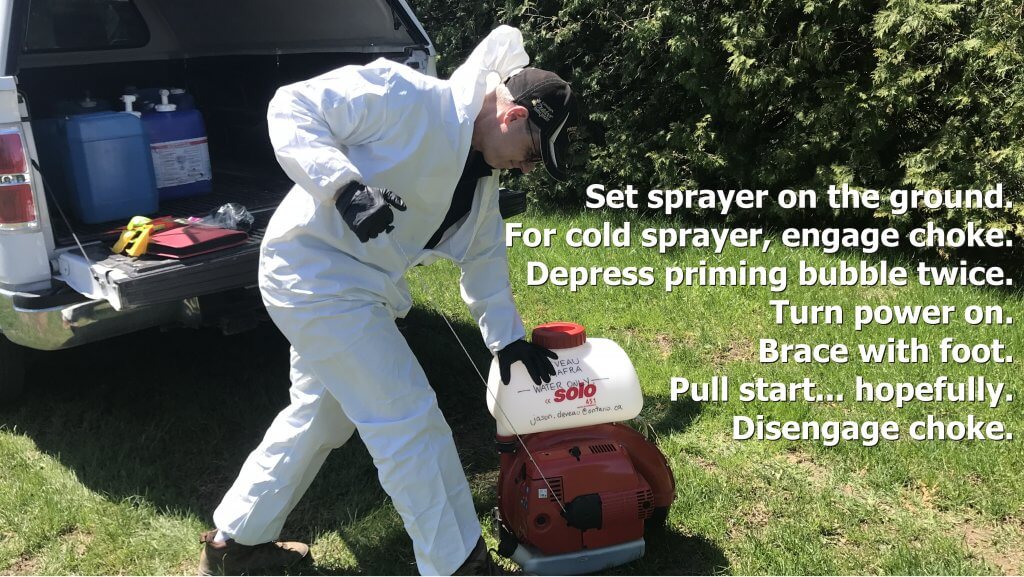
    With the sprayer on the ground, brace it with your foot. Step on the metal frame, not the motor housing or tank. Follow the operating instructions to pull start the motor.
    Being cautious of the hot exhaust, set the sprayer on a tailgate, or other elevated surface to facilitate strapping it on.

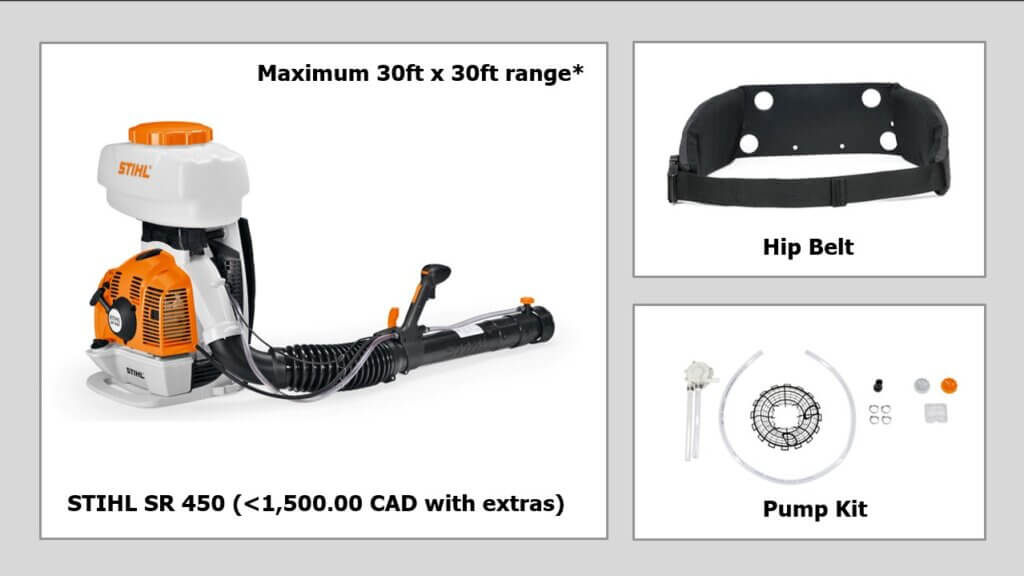
    Be aware that most mistblowers use gravity to feed the spray mix from the tank to the boom. A pressure pump kit is recommended for applications where the spray tube is held upward more than 30 degrees to maintain a consistent discharge rate. A hip belt is also recommended to reduce fatigue. Examples are shown below are for Stihl-brand sprayers. Some may or may not require the pump (e.g. Tomahawk) but they are primarily intended for mosquito control and in that case a consistent rate over a vertical plane may not be as important.

    If your sprayer does not have a pump kit, pointing the boom upward will cause spray to slow or even stop. This greatly diminishes your ability to reach high targets and achieve consistent coverage. In this case, attach the deflector (which comes with the sprayer) before proceeding with the calibration.

    Deflectors angle the spray upwards without having to lift the boom. This is easier on your shoulder and keeps the rate consistent.

    Set the flow rate to the preferred setting (usually a dial at the end of the boom), and using a stopwatch, time how long it takes to spray the entire volume. Be sure to move the boom exactly as you would when spraying the target, either side-to-side or up-and-down, to capture possible rate changes from the gravity feed. Convert the output to US gal./min.

    When timing output, move the boom as you would when spraying the target.

    Alternately, some people will stand on a bathroom scale with the backpack full. Then get off and spray for a period of time. Then get back on the scale. One millilitre of water weighs one gram, so you can calculate the flow from the weight difference.

    Now you know the area and the emission rate. You should have a target carrier volume in mind (e.g. L/ha). Using the following example, let’s determine how long you need to spray the target:

    A sample calibration.

    In this example, an ideal airblast Carrier Volume [C] for the orchard is 400 L/ha. We want to scale this down to determine the Volume for Treated Area [V]. First, divide [C] by 100 to convert it to 40 mL/m2. Then, because in Canada our nozzles are in US units, we do an ugly conversion: Since 1 mL = 0.000264 US gallons, [C] becomes 0.0106 US gal./m2.

    The Treated Area [A] measures 3.5 m by 2 m = 7 m2.

    The Emission Rate [R] is the rate the plot sprayer sprays. While we prefer using a mistblower, many still use a hand wand with no air assist. In this case let’s suppose we are using a hand wand with two 8002 flat fan nozzles operating at 40 psi. According to our calibration, we confirm it sprays 0.4 US gal./min.

    • [C](US gal./m2) × [A](m2) = [V] (US gal.)
    • 0.0106 US gal./m2 × 7 m2 = 0.074 US gal.

    We know we want to spray the target with 0.074 US gal., and we also know [R] which says our boom emits 0.4 US gal./min. We convert this to seconds by dividing by 60, so [R] = 0.0067 US gal./sec. From this we can calculate how long [T] we must spray the target.

    • [V](US gal.) / [R](US gal./sec.) = [T](seconds).
    • 0.074 US gal. / 0.0067 US gal./sec. = approximately 11.0 seconds.

    So, we know that to spray the target with an equivalent 400 L/ha, we must achieve consistent coverage from all sides by spraying it for a total of 11 seconds. Pro tip: Always mix a little more spray volume than you will need to account for priming.

    This is only one way to calibrate a backpack sprayer for spot spraying. If it’s isn’t quite what you need, check out these resources:

    1. Calibrating a Knapsack Sprayer (www.weedfree.co.uk – 2008)
    2. Don’t Overlook Backpack Sprayers (John Grande, Rutgers)
    3. Hand Sprayer Calibration Steps Worksheet (Bob Wolf, Kansas State University – 2010)
    4. Sprayer Calibration Using the 1/128th Method for Motorized Backpack Mist Sprayer Systems (Jensen Uyeda et al., University of Hawai’i – 2015)
    Pro Tip: To maintain a consistent boom height without a wheel, coil a measured length of wire from a plot marker flag to guide you.

    Try this calculator to help calibrate your plot sprayer.

  • Calibrating a Plot Sprayer

    Calibrating a Plot Sprayer

    It’s the rite of passage of many agricultural summer students across the world: applying experimental treatments to field plots using a research sprayer. The results of these experiments may be the basis of new product use registrations, or provide clues into future scientific studies. Needless to say, the application method needs to be bullet proof to ensure the results are reliable. Here are a few guidelines, starting with some tips:

    Pro Tips:

    1. When assembling a hand-held boom, ensure the threads are properly sealed using Teflon tape. More or less tape can be used to create a snug fit at the right part of the thread rotation.

    2. Choose nozzle bodies with diaphragm shutoff valves. These valves stop flow below 10 psi and prevent dripping of the nozzles after shutoff, without pressure drop during operation.

    3. Avoid the use of older style “check-valve strainers”. Although these also prevent drips, they create a pressure loss of about 5 psi which creates uncertainty around the actual spray pressure.

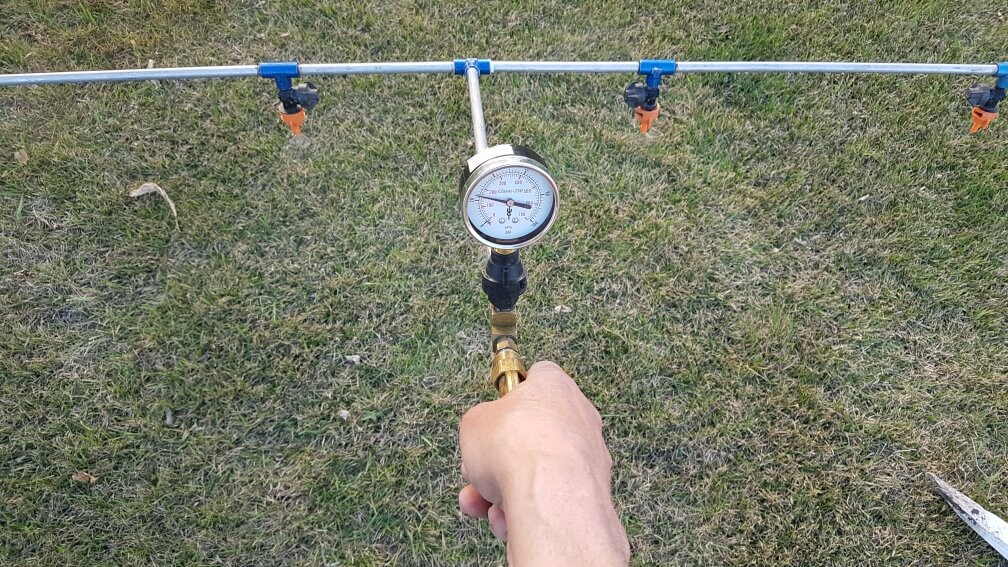
    4. Install a trusted pressure gauge on the handle of the sprayer in clear view for the operator. This provides important information. Don’t believe the gauge on the regulator. Ours, for example, is stuck at 30 psi.

    5. For hand-held booms, rotate the booms so that the nozzles point down, for each application. Different size people or height of crops will change this angle and make accuracy more difficult.

    6. Set the boom height so that you achieve 100% pattern overlap. This means that a nozzle’s pattern width should be twice the boom’s nozzle spacing. Boom height will be close to 50 to 55 cm above target, depending on fan. Too low, and the pattern may cause striping. Your supervisor will see that all year long and think of you.

    7. You can test the spray pattern by applying water to a concrete pad. At the right boom height, the entire boom width should dry at a similar rate.

    8. Install a visual guide for boom height. For example, place a wire flag at the end of the plot, at the correct height. This will provide a handy reference of boom height as your arms get weary. Or hang a wire, zip tie, or chain from a spot that doesn’t interfere with your spray pattern (thanks ACC).

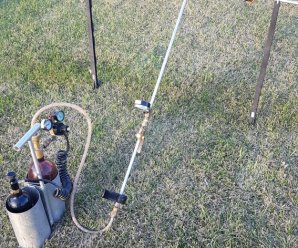
    9. Minimize weight by using smaller bottles of CO2. We use 20 oz paintball bottles, they are much lighter, last long enough, and can be legally refilled with liquid CO2 or topped up with gas from a nurse tank in the field.

    10. Spray out leftover mix in a designated part of the plot area. Do not pour any mix on the ground. Please. Consider a biobed on your research farm.

    11. When completing a treatment, spray the boom completely empty so air comes out of each nozzle. This provides certainty that the next liquid at the nozzles is from the next bottle, be it water or another treatment.

    12. When spraying dose responses of the same product, always start with the lowest dose. Again, spray out in a designated place until the boom produces air, no need to flush.

    13. Construct a boom hanger from electric fence posts and coat hangers. Nozzles face down and can be serviced. The boom should never lie on the ground.

    14. Use nozzle screens to prevent time delays due to plugging. Usually 50 (blue) or 80 (yellow) mesh is sufficient. Any finer mesh may interfere with some dry formulations. Note: Beware old screens – ISO mesh colours have changed. Learn more here.

    15. It’s very useful to apply research sprays with low-drift nozzles. Air-induction tips are most effective. These reduce drift, and are also closer to the commercial spray quality used by producers.

    16. 01 size (orange) air-induced nozzles are available from Albuz (AVI Twin and AVI), Arag (CFA, CFAU, AFC), Billericay (Air Bubble Jet), Greenleaf (AirMix and TurboDrop XL), Lechler (ID3 and IDK). No other major manufacturer produces this small size of tips in air-induction.

    17. 015 size tips (green) and larger are produced by the above, as well as Albuz (CVI Twin and CVI), Hypro (GuardianAIR or ULD) and TeeJet (AIXR, AI, and TTI), within both manufacturers listed in order of increasing coarseness.

    18. Always carry several other nozzles of the same size and type already on the boom. Should a nozzle plug, replace it, don’t clean it. Clean it later.

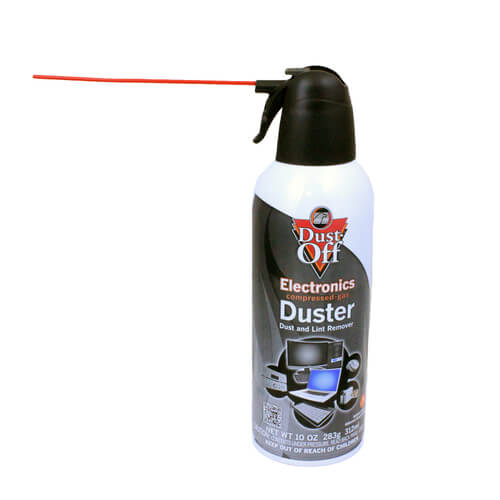
    19. If a nozzle plugs and there is no extra nozzle, use compressed air to clean it. Compressed air electronics cleaners are available in most electronic stores.

    20. If a plugged nozzle can’t be cleaned, simply place it at the end of the boom and continue. Plot ratings and yields are usually taken from the centre. Remind your supervisor of this.


    21. Always de-pressurize a sprayer before disconnecting any liquid hoses. You can’t rely on check valves. If two people work together, make sure you practice and communicate this with each other.

    Calibration:

    1. Assemble the sprayer and run water through it to ensure it’s free from silt or residue. Repair leaks.

    2. Install nozzles and ensure none are plugged and the pattern looks good.

    3. While spraying water, set pressure to what you intend to spray with. (Note: boom pressure will be lower than regulator (attached to CO2 canister) by a few psi, hence the separate pressure gauge on the boom. Also note that the set pressure will always be higher when the system is at rest.)

    4. Obtain four containers of similar size that can hold about 500 mL, and place on ground at nozzle spacing. Using stopwatch, emit spray directly into all four for a set time, say 30 s.

    5. Expected spray volume at 40 psi: 01 tip, 380 mL/min; 015 tip, 570 mL/min; 02 tip, 760 mL/min. In other words, from a 2 L bottle you’ll not get much more than 30 s spray time from 4 tips.

    6. Measure collected volume from four tips using the same graduated cylinder.

    7. Repeat, for total of three times.

    8. Average three reps for each nozzle and convert to mL/min. Make sure all nozzles are within 5% of the average flow. Replace those that aren’t or place worst offender on outside edge of boom.

    9. Advance to “Calculations”, but be prepared to conduct another calibration

    Now for the fun part.

    Calculations

    There are three options for applying the correct amount. We’ll be using metric in these examples:

    1. Use the average nozzle flow from the calibration (mL/min) and the target application volume (L/ha) to calculate the necessary walking speed (km/h);

      or
    2. Use the flow from the calibration and a set walking speed to arrive at an application volume;

      or
    3. Use a set walking speed and a set application volume to calculate a required calibrated flow.

    Option 1:

    Walking Speed = (60*flow)/(Volume*nozzle spacing)

    If your nozzle flow was 330 mL/min and you wanted to apply 100 L/ha using a sprayer with 50 cm nozzle spacing, your required walking speed is 60*330/100/50 = 3.96 km/h

    Option 2:

    Application Volume = (60*flow)/(Speed*spacing)

    If your nozzle flow was 330 mL/min and you wanted to walk 5 km/h using a sprayer with 50 cm nozzle spacing, your application volume is 60*330/5/50 = 79 L/ha

    Option 3:

    Required flow = (Speed *Volume*spacing)/60

    If your speed is 5 km/h and you wanted to apply 100 L/ha using a sprayer with 50 cm nozzle spacing, your required flow is 5*100*50/60 = 417 mL/min

    If you selected Option 3, you now need to return to your sprayer and find a nozzle, or a pressure, that delivers an average of 417 mL/min. You can use math to get into the ballpark with the nozzle you already have:

    New Pressure = (required flow/calibrated flow)2*calibrated pressure

    If your required flow is 417 mL/min and the calibrated flow is 330 mL/min, and you calibrated at 30 psi, then you should be close to your required flow at (417/330)2*30 = 48 psi

    Now, return to your sprayer, set the pressure to 48 psi, and confirm this estimate.

    We use Option 3 when comparing nozzles of the same size but from different manufacturers. It’s not uncommon for these to have slightly different outputs. Rather than adjusting our walking speed slightly, which is very difficult to do accurately, we change pressure slightly so all nozzles produce the same flow. This is also useful when comparing water volumes by switching to a larger nozzle.

    Travel Speed:

    The last step is to confirm travel speed. Say you want to walk at 5 km/h. The best way to calibrate walking speed is to measure a known distance (m) in the field you’ll spray. Wearing the gear and carrying the sprayer you will use to spray, walk this distance. Use a wire flag to mark the start and end points; when the boom hits the flags, start and stop the timer. Repeat until comfortable.

    Time needed to walk distance:

    Time (s) = Distance *3.6/required speed

    Say your walking distance is 10 m, and you need to walk 5 km/h.

    10*3.6/5 = 7.2 s

    A simple spreadsheet that can be used for the calculations can be found here.

    Congratulations! You’re done. Happy spraying! Remember to not worry too much about a 5% deviation from your expected application. That’s definitely an acceptable error, as long as you don’t allow too many of those to add up.

    Low Volume Research (Aerial)

    Some product uses are by air, and the label volumes for those are often 30 to 50 L/ha. Registrants need to provide efficacy data at those volumes. Ground application can be accepted as a surrogate for aerial as long as the volumes are correct.

    Since the spray nozzles aren’t typically available below the 01 (orange) size and if they are, they usually plug so easily and make such a fine spray that they’re frustrating to use. The alternative, to travel faster, is also problematic on research plots.

    We recommend that Turbo TeeJet nozzles be used for this purpose. They produce such a wide fan angle that a 100 cm spacing is justifiable. Simply cap off every second nozzle body. Booms need to be elevated to ensure overlap, for uniformity. The value of the small nozzles and wider spacings is the low total application volume that is now possible.

    The TT tips can also be used at fairly low spray pressures (say 20 psi) further reducing their output.

    Spray Quality of TeeJet Turbo TeeJet (ASABE S572.1). This tip is available in smaller sizes and, due to its wide fan angle, can be used at 40″ (100 cm) spacing, therefoe applying low water volumes.

    /

  • Testing and Correcting Airblast Pressure

    Testing and Correcting Airblast Pressure

    The role of pressure is often underappreciated in spraying. Many airblast operators (still) don’t use rate controllers, so the only way to monitor sprayer pressure is using a single liquid-filled pressure gauge located near the pump… and it may not be trustworthy. An inaccurate pressure gauge may cause you to spray more or less product than you intended. That translates to wasted resources and potentially higher residue levels. Conversely, spraying less than intended may lead to reduced efficacy and the need to re-apply. Many operators use budget pressure gauges on their sprayers and have never tested or replaced them.

    Testing pressure gauges

    Here are a few clear indications that your pressure gauge should be retired:

    • Gauge has an opaque or unreadable face
    • Mineral oil leaking or mostly gone
    • Needle does not rest on zero pin when sprayer is not under pressure (it has likely spiked)

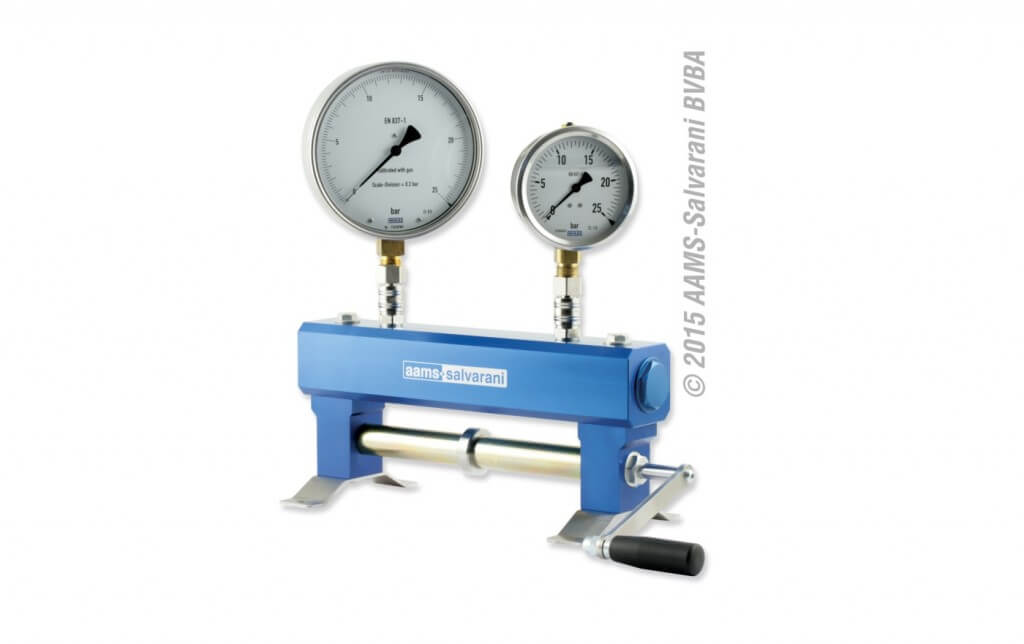
    Sometimes a gauge is not obviously in need of replacement. To test it, you need to apply a known pressure to see if it is reading accurately. One way to do this is using a commercial manometer.

    AAMS-SALVARANI Gauge tester
    AAMS-SALVARANI manometer

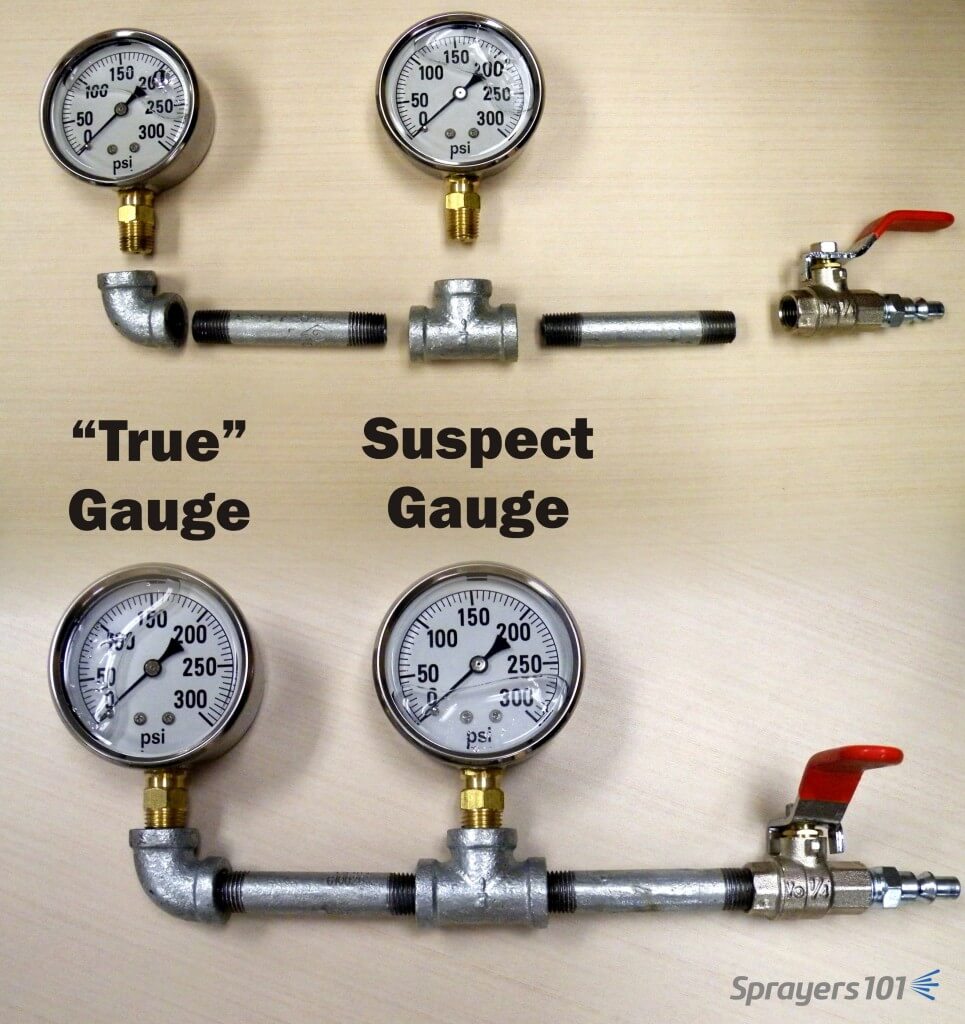
    These systems work well, but they can be an expensive proposition if you only use them once in a while. In a past sprayer workshop, one participant had a great suggestion for testing gauges. His idea was to use an air compressor (which most farms have) and some simple plumbing to create a homemade manometer. Be sure to vent the gauges before testing.

    The Pressure Gauge Tester. The “true” gauge is in the elbow and can be compared to the suspect gauge in the tee. Concept from K. Voege, Ontario.
    The “Pressure Gauge Tester”. The accurate gauge is in the elbow and is compared to the suspect gauge in the tee. Concept: K. Voege, Ontario.

    This tool allows you to test your suspect gauge (set in the tee) against an accurate gauge (set in the elbow) for less than $75.00 CAD. Construct your own “Pressure Gauge Tester” using the following parts (valve optional):

    PartApprox. Price (CAD)
    ¼” by 3” Galvanized nipples (x 2)$3.50
    ¼” Galvanized 90º elbow$3.50
    ¼” Galvanized Tee$3.50
    ¼” Ball valve (threaded)$10.00
    *Plug Air Connector (A over ¼”)$4.00
    Teflon pipe tape$3.00
    †300 psi liquid-filled gauge$40.00
    *Depending on the quick-connect fitting on your compressor 
    †The range of the accurate gauge should match your existing gauge. The range of your existing gauge should be twice as much as your typical operating pressure. 

    As a public service announcement, be aware that many budget, liquid-filled gauges are inaccurate right off the shelf. A 5% variance is typical. When replacing a worn gauge, or buying the “accurate” test gauge for your homemade manometer, buy a few and save the receipt. Test them in different combinations to ensure they all agree with one another. Return the extras and let the dealer know if you discover an inaccurate gauge. I’m sure they won’t put it back on the shelf for the next person… *ahem*.

    Gauges should be rated twice as high as your average operating pressure. For example, if you typically spray at 150 psi, your should have a gauge rated up to 300 psi. That way, you can see small changes in pressure more clearly. Plus, if your needle is pointing straight up, a quick glance confirms the ideal operating pressure.

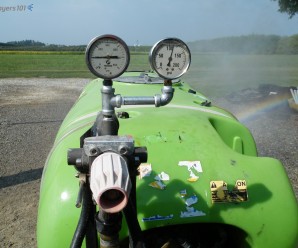
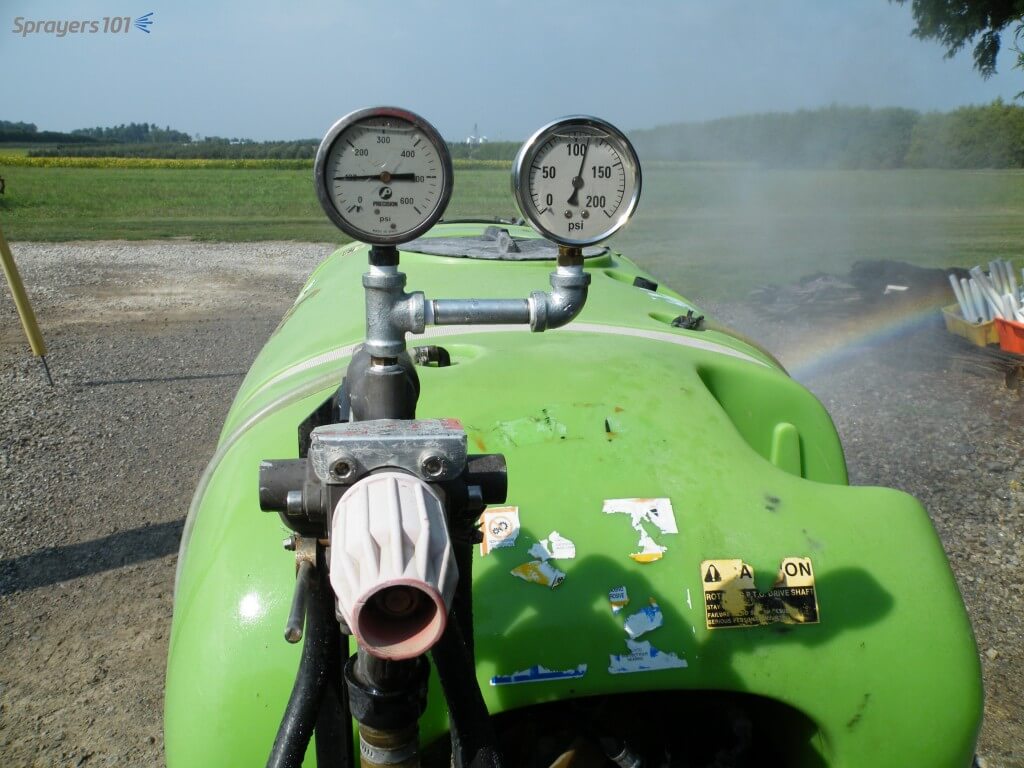
    Another way to confirm pressure gauge accuracy is to install a second in-line. They’ll keep one another honest. This may be difficult if the gauge set into a molded plastic tank, or located under the chassis next to the pump where it is not visible from the tractor.

    Two gauges keep each other honest – this GB (Italian-made Good Boy) is sporting a home-made assembly that cost ~$50 to assemble, including the second gauge. The silver spray paint on the black pipe prevents rust and makes it look pretty darn sharp.
    Two gauges keep each other honest – this GB (Italian-made Good Boy) is sporting a home-made assembly that cost ~$75 CAD to assemble. The silver spray paint on the black pipe prevents rust and makes it look pretty darn sharp. Note that they should be the same range, but are not in this photo. The one on the right is the correct range for this operating pressure.

    Measuring and Correcting for Pressure Drop

    Boom pressure can sometimes be less than the desired operating pressure (a phenomenon known as “pressure drop”) and must be accounted for. Pressure drop is affected by hose diameter, hose fittings, and the distance from the pump. You’ll find it at the far ends of boom sections on field sprayers and it’s an issue that plagues many low-pressure, tower-style sprayers. Dress appropriately because you’re going to get wet performing this diagnostic.

    1. Fill a clean sprayer about half-full with water.
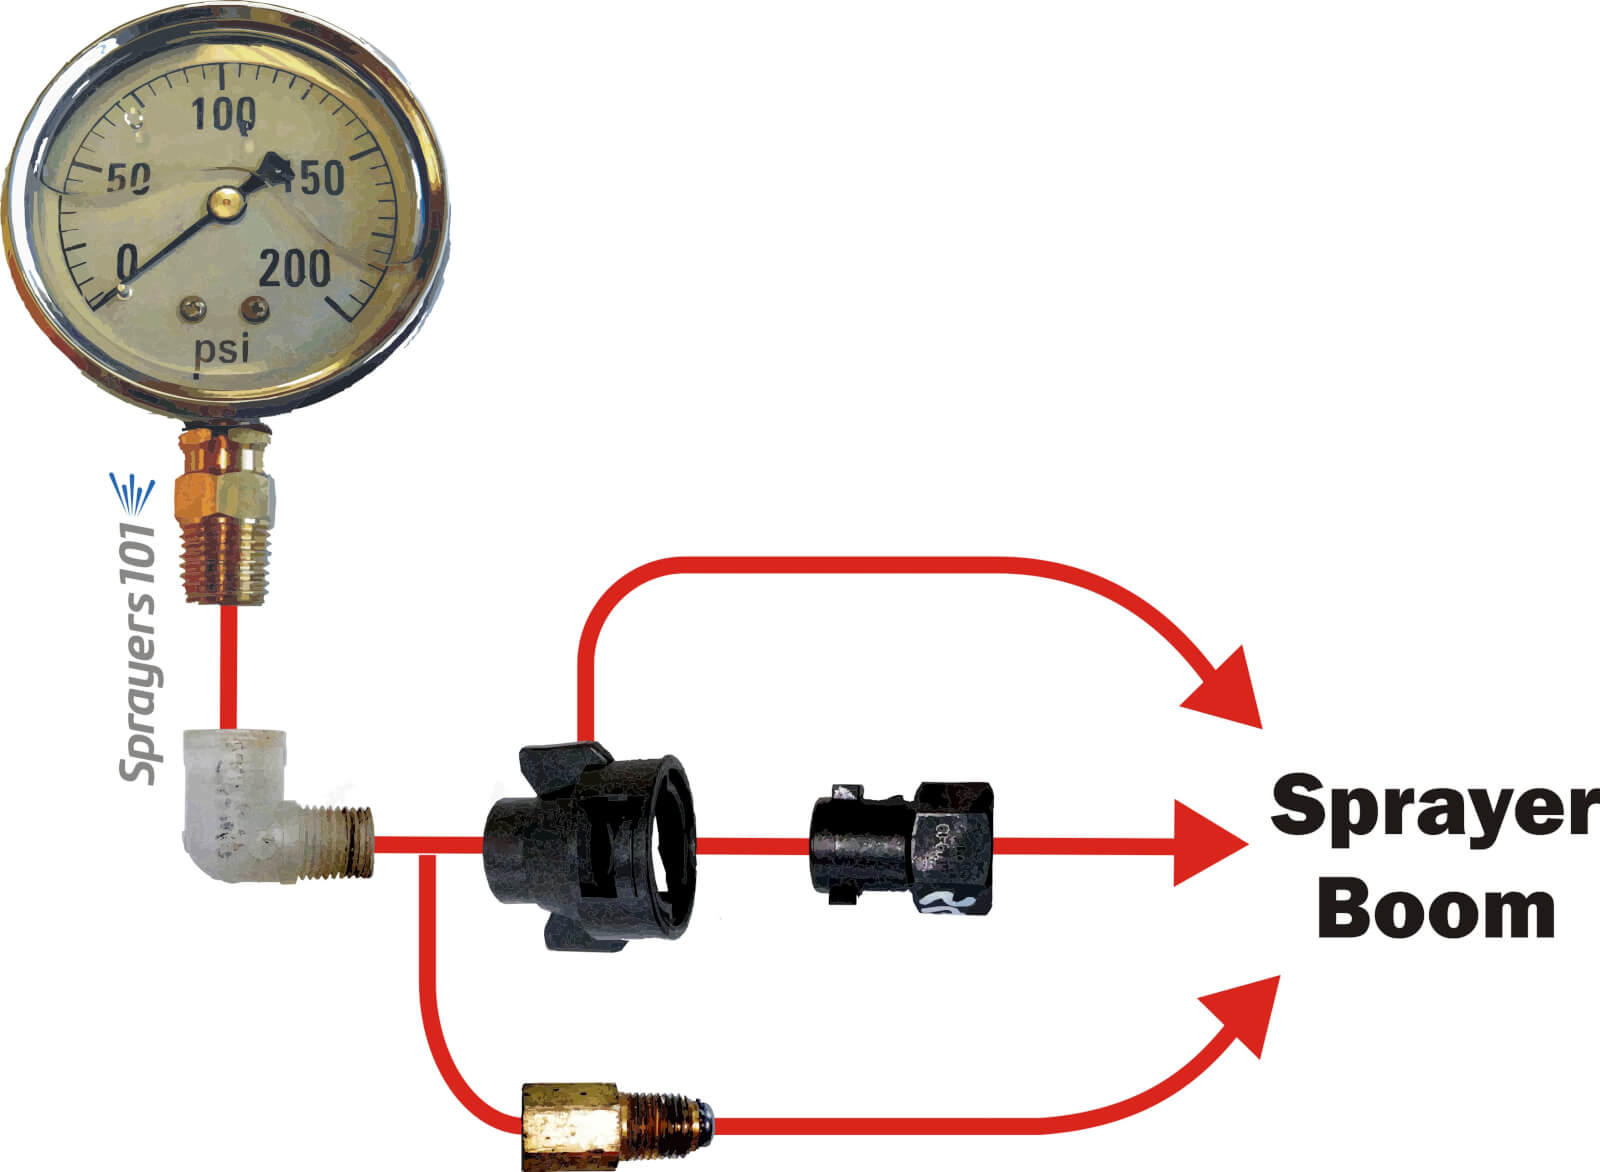
    2. Install a liquid-filled test gauge in the highest nozzle position of one of the booms. The image below shows how the nozzle cap or entire nozzle body may need to be removed for this step. For Metric fittings, contact your sprayer dealer – they can be hard to find.
    3. With the tractor parked, bring up the rpms and get the lines to the desired operating pressure.
    4. Open the boom(s) and measure the pressure at the nozzle farthest from the pump. All nozzles on all booms should be open during this test. That’s why you are wearing PPE.
    5. For positive displacement pumps, adjust the main pressure regulator until the test gauge reads the desired pressure. For centrifugal pumps, it is possible to make small changes to the pressure, but more important to note any pressure differential for later considerations regarding nozzle output and spray quality.
    There are many ways to install a gauge onto a nozzle body. Here are three examples of common fittings.
    There are many ways to install a gauge onto a nozzle body. Here are three examples of common fittings.

    Switching between multi and single boom operation

    When sprayers that employ a positive-displacement pump are switched to one-sided operation (E.g., border spraying or during turns), the pressure can change considerably. Most units will experience a pressure increase, thereby increasing the boom output. This is typically an indication of a faulty relief valve, which is positioned between the pump and nozzles. It’s actuated by a spring-loaded piston or diaphragm, opening and closing in response to changes in pressure. The operator sets the desired pressure and any additional pressure forces the valve open, diverting excess flow back to the tank via a bypass.

    Spraying from one boom. This operator checked to make sure the pressure didn’t increase when he closed the second boom. High pressures or sudden spikes could indicate a faulty regulator valve.
    Spraying from one boom. This operator checked to make sure the pressure didn’t increase when he closed the second boom. High pressures or sudden spikes could indicate a faulty relief valve.

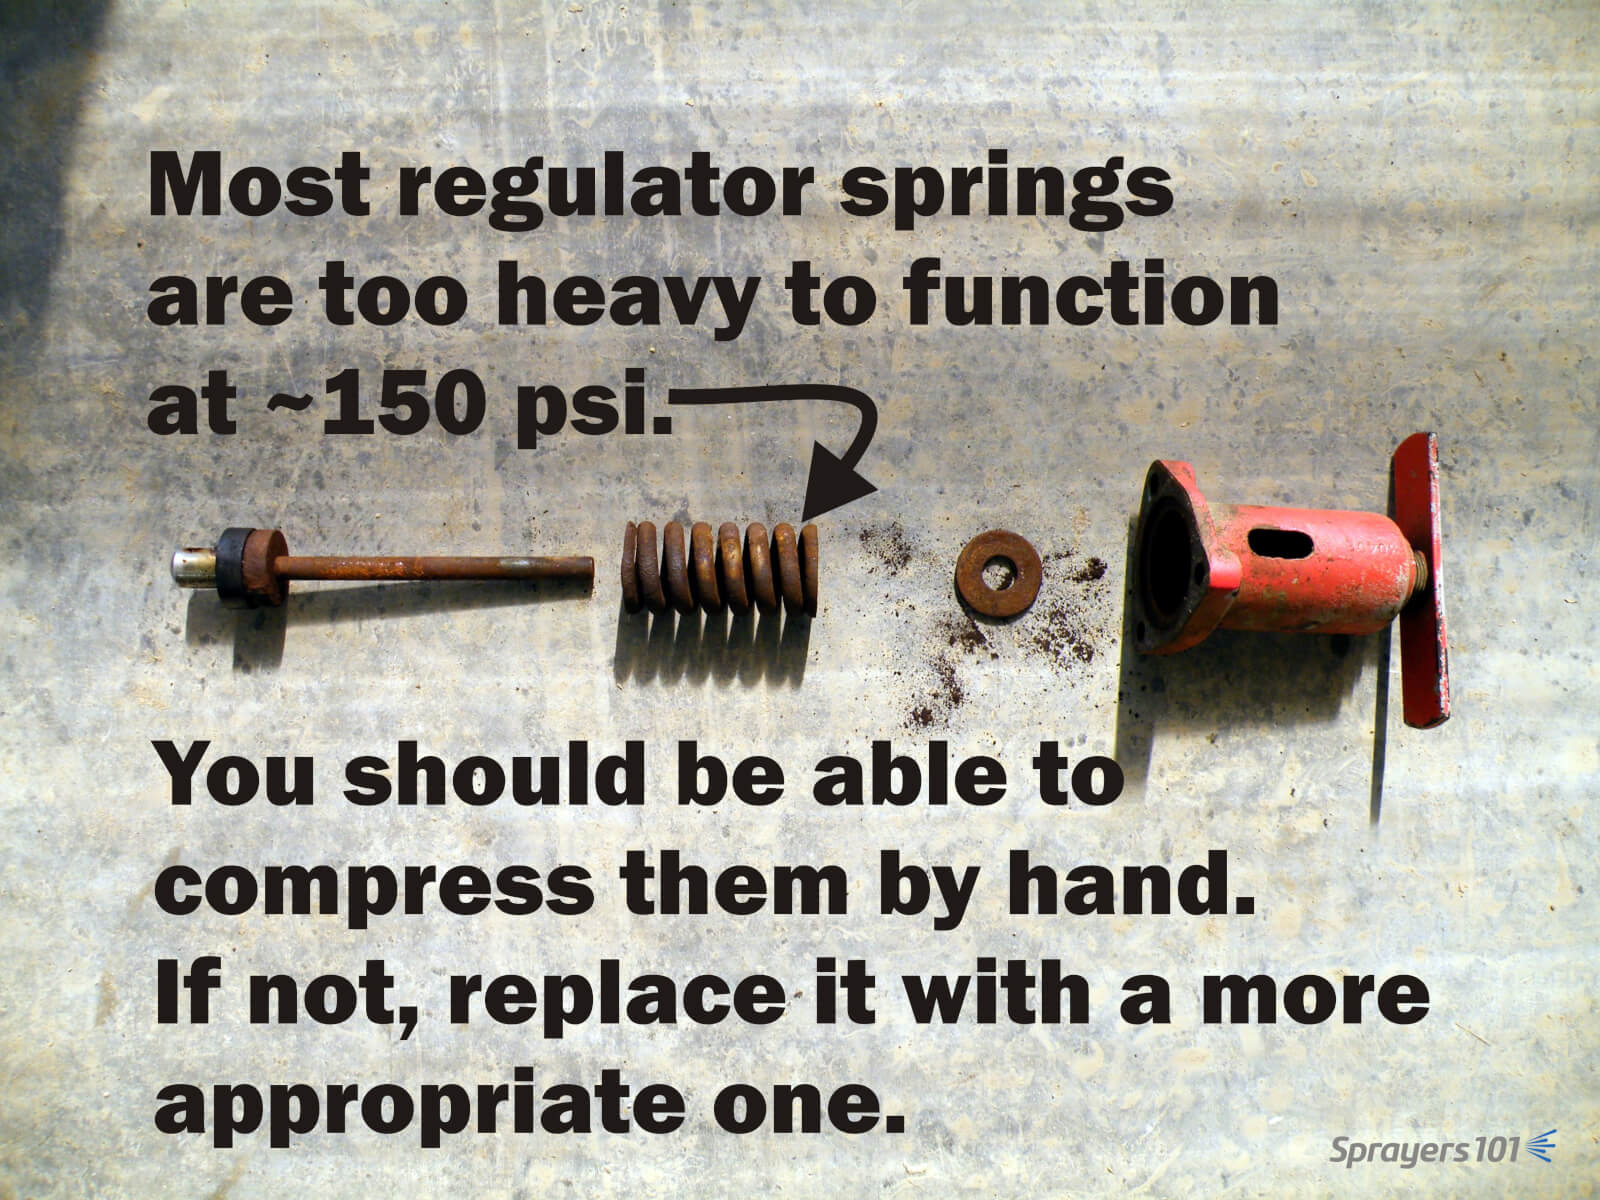
    This problem can be greatly reduced by properly sizing the regulator (specifically the spring) to the typical operating pressure. Many sprayers come equipped with regulator springs matched to the maximum pressure range of the pump (often 600 – 900 psi). These springs are unable to respond to changes when operating at lower pressures (E.g., 100-200 psi, which is typical of applications to moderately-sized canopies).

    The springs are so stiff that the liquid pressure is unable to act on the spring and the valve essentially acts as a flow control (throttling) valve rather than a pressure control valve. Liquid pressure is difficult to control using a throttling valve; it is unable to compensate if the tractor engine speed drops while driving uphill and sprayer output is subsequently reduced. Further, this phenomenon can cause pressure gauges to spike.

    Valve springs and seats wear out, such as in this regulator assembly. Check yours each season.
    Valve springs and seats wear out, such as in this regulator assembly. Check yours each season. If you spray using moderate pressures, be sure your regulator spring can compensate for small changes.

    Some sprayer designs attempt to compensate for excess flow during single-boom operation. They employ an additional throttling valve to shunt the volume that would normally would be spraying out through the closed boom. The result is that the pressure should remain constant when a single boom is shut off. If your sprayer has this feature, here’s how you set the valve:

    1. With PTO at application speed and both booms open, adjust regulator to calibrated operating pressure.
    2. Close one boom.
    3. If pressure increases, open throttling valve to achieve calibrated operating pressure. If pressure decreases, close throttling valve to achieve calibrated operating pressure.
    4. Repeat process for the other boom, and find a compromise position for the valve.

    Some operators elect to remove the handle from the throttling valve once it is set so they don’t accidentally bump it later. That’s fine, but further adjustments may be required when transitioning between dilute and concentrated volumes, so don’t lose the handle.

    Here’s an oldie-but-a-goodie filmed in New Hampshire in June, 2014. It’s something to keep in mind when you’re getting your sprayer ready for spring service. Thanks to Chazzbo Media and Penn State Extension for making an unscripted and spur-of-the-moment concept into a polished video.

  • Compulsory, Standardized Sprayer Inspections

    Compulsory, Standardized Sprayer Inspections

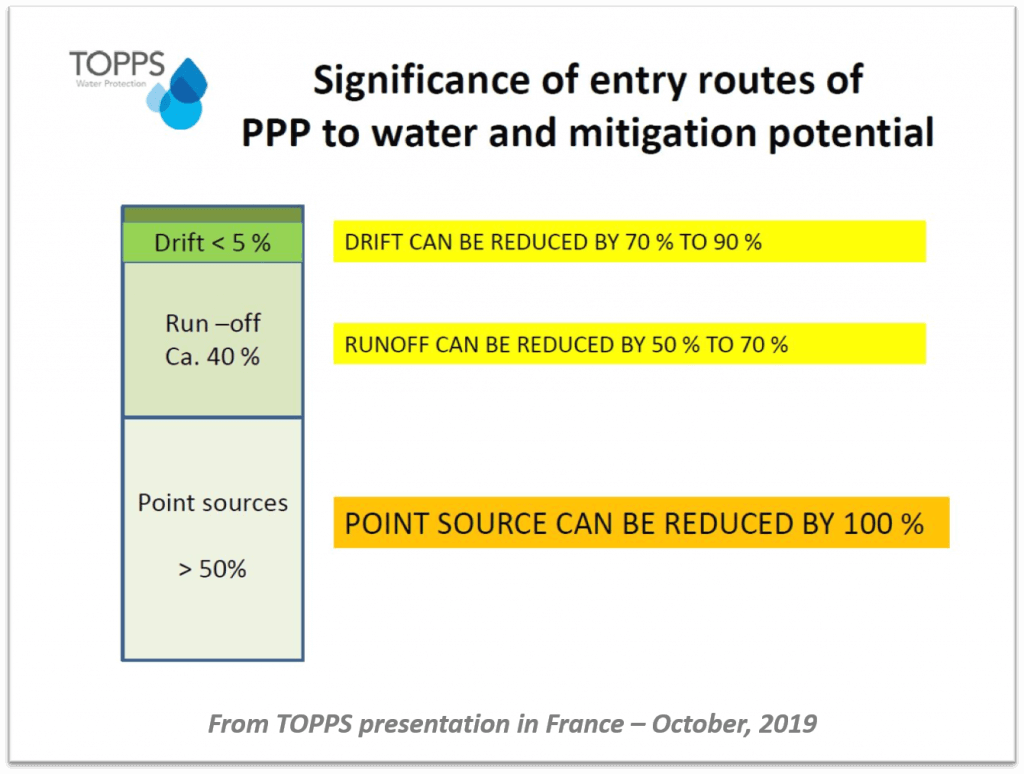
    Spring always brings renewed interest in sprayer calibration. This is good, because a well-maintained and calibrated sprayer will protect crops more effectively and efficiently, as well as reduce the potential for off-target drift and point source contamination.

    Presently, there is no nationally-recognized standard for sprayer calibration in either Canada or the United States. As a result there are many methods, some more stringent than others, spanning activities relating to seasonal maintenance through to precise diagnostic measurements. This means an operator can be in compliance with programs such as CanadaGAP (a food safety traceability standard for fruit and vegetables), and yet only perform the most rudimentary adjustments.

    I was first made aware of “compulsory inspections” in 2009 when I started noticing certification stickers on certain European import airblast sprayers. Some Ontario tender fruit and grape growers familiar with the European standards asked why we didn’t enforce standardized calibration program as they do in Europe. I was surprised to hear a farmer ask for more paperwork, so it made me wonder, are Canada and the US overdue for a change?

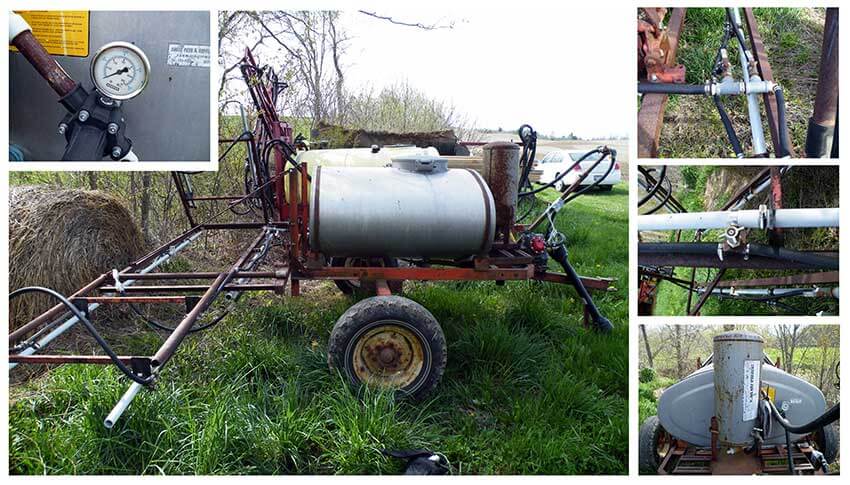
    All sprayers, from large, commercial field and airblast sprayers, to the more humble home-grown sprayers (see below) benefit from regular servicing and calibration. And yet, sprayer calibration in Canada and the US remains largely voluntary and highly variable depending on the size of the operation, sprayer design and the willingness/skill of the operator.

    Canada and the US: Then

    In the mid 1980’s, University of Nebraska engineers and Successful Farming Magazine published a study showing that un-calibrated spray applications were costing US farmers ~$1,000,000,000 per year. The article was infamously called “The Billion Dollar Blunder”. You can download the original journal article describing the survey here.  It was estimated that fewer than 5% of applications were within 5% of the desired rates. Spray overlaps and poor calibration resulted in over-applications of more than 20%.

    At the time it was eye-opening and received a lot of attention. In 2006 the original study was revisited (see here), and even with advances in precision application, there was a disappointing lack of improvement. Bill Casady, University of Missouri Extension agricultural engineer, estimated that if 20 minutes of calibration can save 5% on 500 acres in an application sprayed at $25/ac ($61.75/ha), then the 20 minutes of effort worked out to $1,875 / hour. Now that’s a solid return on investment!

    Belgium: Then

    Belgium recognized and addressed this issue more than twenty years ago. In 1995, following the lead of the Netherlands and Germany, Belgium’s Ministry of Agriculture mandated that all spraying equipment (save backpacks) be inspected every three years. At the time, other countries such as Sweden, Hungary and Austria had similar, albeit voluntary, programs.

    Belgian farmers received letters asking them to make their sprayers available for testing by a Ministry-appointed institution, in locations no more than 10 kilometers from their operations. The institution’s trained technicians would subject the sprayers to a regimented, standardized inspection. When the equipment met the standard, they would receive a permit in the form of a sticker (see below) attached to the sprayer. The growers paid for this service, based in part on the size of the sprayer.

    In order to introduce the process to the Belgian farmer, a short documentary was produced. If you would rather not watch the preamble explaining why the prudent use of chemistry is critical to agriculture, and get right to the sprayer inspection process, skip ahead to 3:35.

    What follows is a brief outline of that 1995 process, which I’m told is similar to the process currently used in Belgium:

    1. Administrators perform visual checks to assess the general condition of the sprayer (e.g. obvious maintenance, safety and operational issues).
    2. Boom balance (where applicable), hinges, boom ends and boom sturdiness is checked.
    3. Nozzle spacing and orientation of nozzle bodies is inspected.
    4. All points of filtration are inspected.
    5. For boom sprayers, a spray pattern distribution used to be performed, but it wasn’t diagnostic enough. Instead, a pressure gauge / nozzle combo is used in each position to check for pressure fluctuation, and to ensure each tip had a flow rate within 5% of the average and no more than 10% deviation from the manufacturer’s rate.
    6. For airblast sprayers, the overall output of the sprayer is measured to determine nozzle wear using individual collectors clamped onto each position.
    7. For sprayers with rate controllers, calibrated collection bags are attached to a few nozzles and the sprayer drives a 100 metre course while spraying. The actual output is compared to the expected.
    8. Finally, the farmer receives a report outlining issues that need to be remedied before the sprayer is certified.

    SPISE: Today

    Today, collaborating European countries are members of SPISE – Standardized Procedure for the Inspection of Sprayers in Europe. Established in 2004 by founding members from Belgium, France, Germany, Italy and the Netherlands, the SPISE Working Group aims to “further the harmonization and mutual acceptance of equipment inspections”. They also work to continually improve the inspection / calibration process.

    Their website hosts a number of sprayer-related resources, but the SPICE Advice handbooks are perhaps most valuable to the sprayer operator. Click either image below to download them as PDF for airblast or field sprayers:

    This more current video by AAMS-Salvarani goes though the inspection and adjustment process for airblast sprayers. While there is no mention of air speed adjustments, many of the steps in this video correspond with the airblast adjustments relating to Crop-Adapted Spraying which has proven very successful in Canada.

    Canada and the US: Tomorrow

    Regular, third-party mediated inspections offer many potential benefits to the average operator. But, in order to realize gains in crop protection and environmental stewardship, perhaps there are two programs required: One to certify the sprayer and the other to certify the sprayer operator.

    1. A sprayer inspection program would focus on sprayer maintenance rather than calibration. Maintenance occurs at regular intervals to ensure spray equipment is operating optimally. Calibration is an ongoing process intended to match the sprayer to the conditions in which it’s operating, and that requires an educated sprayer operator.
    2. Sprayer operator education programs such as Ontario’s Grower Pesticide Safety Course, or Penn State’s Pesticide Applicator Certification Course already exist, but they are not offered in every state or province, and they are often voluntary or perhaps specific to a particular expertise (e.g. not applying to custom applicators or airblast operators).

    They could start as voluntary, pay-for-service pilot programs to see if operators appreciate how much better their sprayers are functioning, and to quantify how much waste is been reduced. They wouldn’t necessarily have to be government-run; Industry or Academia may be better conduits. So, what would be required to develop and implement these two programs?

    • We would need to agree on a robust and generic sprayer inspection protocol. We have several European examples to draw on.
    • We would need to agree on the minimal content for a sprayer operator course. Again, we have many to draw on, with the obvious understanding that the core curriculum would be amended to reflect various state and provincial requirements.
    • We would need a trained, third-party organization to take responsibility for overseeing and implementing the two programs.
    • And, of course, we would need the funds to initiate both programs before they would eventually become self-sustaining.

    So, are we dreaming in Technicolor? If responses to this article are any indication, there are those in western society that lash out at the idea of mandatory requirements. But there are supporters, too. Maybe we can learn from those European countries that have been doing this for more than 20 years.

    Thanks to Jan Langenakens of aams for reviewing this article, and providing the videos.